Friday, March 30, 2012
Building Mobile Applications with Java: Using the Google Web Toolkit and PhoneGap
Mobile applications are hard enough to design and build without having to rewrite the app for multiple, often incompatible, platforms. Using GWT and PhoneGap this book will show you how you can use a language you already know, Java, to build mobile apps for multiple mobile platforms at once; even on platforms that do not natively support Java. Further, this book will show you how to access device features, design user interfaces that fit the constraints of mobile devices, then use these skills to build a full client/server application for all of the major mobile platforms.
Thursday, March 29, 2012
Building my First JavaFX Application using NetBeans 7.1
Introduction: Building my First JavaFX Application using NetBeans 7.1
This is an Introduction for a series of videos about how to create a simple JavaFX application using NetBeans 7.1. This video will show you the final result, before you can go through the steps.
Inside Oracle's Java Magazine
A bimonthly, digital publication about Java programming language, technology, and applications for professionals relying on them in their careers
http://www.oracle.com/javamagazine
Detect mouse event
This exercise demonstrate how to detect MouseEvent for JavaFX 2.0.

Next:
- Free draw by MouseEvent

package javafx_mouseevent;

import javafx.application.Application;
import javafx.event.EventHandler;
import javafx.scene.Scene;
import javafx.scene.control.Label;
import javafx.scene.input.MouseEvent;
import javafx.scene.layout.StackPane;
import javafx.stage.Stage;

/**
*
* @web http://java-buddy.blogspot.com/
*/
public class JavaFX_MouseEvent extends Application {

  Label label;

  /**
   * @param args the command line arguments
   */
  public static void main(String[] args) {
      launch(args);
  }

  @Override
  public void start(Stage primaryStage) {
      primaryStage.setTitle("java-buddy.blogspot.com");
      StackPane root = new StackPane();
      Scene scene = new Scene(root, 300, 250);

      label = new Label("Wait mouse");


      scene.setOnMouseClicked(mouseHandler);
      scene.setOnMouseDragged(mouseHandler);
      scene.setOnMouseEntered(mouseHandler);
      scene.setOnMouseExited(mouseHandler);
      scene.setOnMouseMoved(mouseHandler);
      scene.setOnMousePressed(mouseHandler);
      scene.setOnMouseReleased(mouseHandler);

      root.getChildren().add(label);
      primaryStage.setScene(scene);
      primaryStage.show();
  }

  EventHandler<MouseEvent> mouseHandler = new EventHandler<MouseEvent>() {

      @Override
      public void handle(MouseEvent mouseEvent) {
          label.setText(mouseEvent.getEventType() + "\n"
                  + "X : Y - " + mouseEvent.getX() + " : " + mouseEvent.getY() + "\n"
                  + "SceneX : SceneY - " + mouseEvent.getSceneX() + " : " + mouseEvent.getSceneY() + "\n"
                  + "ScreenX : ScreenY - " + mouseEvent.getScreenX() + " : " + mouseEvent.getScreenY());
      }

  };

}
Next:
- Free draw by MouseEvent
Wednesday, March 28, 2012
Embed Google Maps in JavaFX WebView
The Google Maps Javascript API lets you embed Google Maps in your own web pages. With WebView in JavaFX 2.0, you can easy embed Google Maps in your Java application.

Create a googlemaps.html to embed Google Maps in web page.
Embed googlemaps.html in WebView in your Java application.
Related:
- Embed OpenLayers with OpenStreetMap in JavaFX WebView

Create a googlemaps.html to embed Google Maps in web page.
<!DOCTYPE html>
<html>
<head>
<title>Java-Buddy: Google Maps</title>
<script src="http://maps.google.com/maps/api/js?sensor=false"></script>
<style>#mapcanvas { height: 360px; width: 100%}</style>

<script>
var map;
function loadmap(){

  var options = {
      zoom: 16,
      center: new google.maps.LatLng(51.507222, -0.1275),
      mapTypeId: google.maps.MapTypeId.SATELLITE
  }
  map = new google.maps.Map(document.getElementById("mapcanvas"), options);
}

</script>

</head>
<body onload="loadmap()">
<h1>Java-Buddy: Google Maps</h1>
<div id="mapcanvas"></div>
</body>
</html>
Embed googlemaps.html in WebView in your Java application.
package javafx_googlemaps;

import java.net.URL;
import javafx.application.Application;
import javafx.event.ActionEvent;
import javafx.event.EventHandler;
import javafx.geometry.HPos;
import javafx.geometry.Insets;
import javafx.geometry.VPos;
import javafx.scene.Scene;
import javafx.scene.control.Button;
import javafx.scene.control.Label;
import javafx.scene.control.TextField;
import javafx.scene.layout.HBox;
import javafx.scene.layout.Region;
import javafx.scene.layout.StackPane;
import javafx.scene.web.WebEngine;
import javafx.scene.web.WebEvent;
import javafx.scene.web.WebView;
import javafx.stage.Stage;

/**
*
* @web http://java-buddy.blogspot.com/
*/
public class JavaFX_GoogleMaps extends Application {

  private Scene scene;
  MyBrowser myBrowser;

  /**
   * @param args the command line arguments
   */
  public static void main(String[] args) {
      launch(args);
  }

  @Override
  public void start(Stage primaryStage) {
      primaryStage.setTitle("java-buddy.blogspot.com");

      myBrowser = new MyBrowser();
      scene = new Scene(myBrowser, 640, 480);

      primaryStage.setScene(scene);
      primaryStage.show();
  }

  class MyBrowser extends Region{

      HBox toolbar;

      WebView webView = new WebView();
      WebEngine webEngine = webView.getEngine();

      public MyBrowser(){

          final URL urlGoogleMaps = getClass().getResource("googlemaps.html");
          webEngine.load(urlGoogleMaps.toExternalForm());

          getChildren().add(webView);

      }

  }
}
Related:
- Embed OpenLayers with OpenStreetMap in JavaFX WebView
JavaFX 2.0: OnAlert EventHandler of WebEngine.
WebEngine of JavaFX 2.0 provide a setOnAlert(EventHandler<WebEvent<java.lang.String>> handler); it set EventHandler which will be called when alert() function is called by Javascript inside WebView.

Refer to the previous article "Execute JavaScript in WebView from Java code":
- Modify hello.html to add a Javascript pageOnLoad() function to call alert(), and also modify <body> to run pageOnLoad() when page loaded.
- Modify JavaFX code to call setOnAlert() to implement OnAlert EventHandler.
Related:
- Communication between JavaFX and JavaScript inside WebView, using JSObject

Refer to the previous article "Execute JavaScript in WebView from Java code":
- Modify hello.html to add a Javascript pageOnLoad() function to call alert(), and also modify <body> to run pageOnLoad() when page loaded.
<!DOCTYPE html>
<html lang="en-US">
<head>
<meta charset=utf-8>
<title>Hello Java-Buddy! (from WebPage)</title>

<script>
function updateHello(user){
    document.getElementById("helloprompt").innerHTML="Hello: " + user;
}

function clearHello(user){
    document.getElementById("helloprompt").innerHTML="Hello <a href='http://java-buddy.blogspot.com/'>Java-Buddy</a>";
}

function pageOnLoad(){
    alert();
}
</script>

</head>
<body onload="pageOnLoad()">
<img src="https://blogger.googleusercontent.com/img/b/R29vZ2xl/AVvXsEjxGfYYk9MPmsy4Fb5yBONPauX59KlswhZvZL_XoWgvPMp2SwHsLorHIo4aWZJsUc9oynuzwstK5MfzjmjmNevnJFjJt1HIhcl-iRH3dnK2twWSeX6MdjSbAz4nyMzaNQE1p-Pajqfg3KKN/s150/duke_44x80.png"/>
<p id="helloprompt">Hello <a href="http://java-buddy.blogspot.com/">Java-Buddy</a></p>
</body>
</html>
- Modify JavaFX code to call setOnAlert() to implement OnAlert EventHandler.
package javafx_webview;

import java.net.URL;
import javafx.application.Application;
import javafx.event.ActionEvent;
import javafx.event.EventHandler;
import javafx.geometry.HPos;
import javafx.geometry.Insets;
import javafx.geometry.VPos;
import javafx.scene.Scene;
import javafx.scene.control.Button;
import javafx.scene.control.Label;
import javafx.scene.control.TextField;
import javafx.scene.layout.HBox;
import javafx.scene.layout.Region;
import javafx.scene.web.WebEngine;
import javafx.scene.web.WebEvent;
import javafx.scene.web.WebView;
import javafx.stage.Stage;

/**
 *
 * @web http://java-buddy.blogspot.com/
 */
public class JavaFX_Browser extends Application {

    private Scene scene;
    MyBrowser myBrowser;

    /**
     * @param args the command line arguments
     */
    public static void main(String[] args) {
        launch(args);
    }

    @Override
    public void start(Stage primaryStage) {
        primaryStage.setTitle("java-buddy.blogspot.com");

        myBrowser = new MyBrowser();
        scene = new Scene(myBrowser, 640, 480);

        primaryStage.setScene(scene);
        primaryStage.show();
    }

    class MyBrowser extends Region{

        HBox toolbar;

        WebView webView = new WebView();
        WebEngine webEngine = webView.getEngine();

        public MyBrowser(){

            final Label labelWebTitle = new Label();

            final URL urlHello = getClass().getResource("hello.html");
            webEngine.load(urlHello.toExternalForm());

            webEngine.setOnAlert(new EventHandler<WebEvent<String>>(){

                @Override
                public void handle(WebEvent<String> arg0) {
                    labelWebTitle.setText(webEngine.getTitle());
                }

            });

            final TextField textField = new TextField ();
            textField.setPromptText("Hello! Who are?");

            Button buttonEnter = new Button("Enter");
            buttonEnter.setOnAction(new EventHandler<ActionEvent>(){

                @Override
                public void handle(ActionEvent arg0) {
                    webEngine.executeScript( " updateHello(' " + textField.getText() + " ') " );
                }
            });

            Button buttonClear = new Button("Clear");
            buttonClear.setOnAction(new EventHandler<ActionEvent>(){

                @Override
                public void handle(ActionEvent arg0) {
                    webEngine.executeScript( "clearHello()" );
                }
            });


            toolbar = new HBox();
            toolbar.setPadding(new Insets(10, 10, 10, 10));
            toolbar.setSpacing(10);
            toolbar.setStyle("-fx-background-color: #336699");
            toolbar.getChildren().addAll(labelWebTitle, textField, buttonEnter, buttonClear);

            getChildren().add(toolbar);
            getChildren().add(webView);

        }

        @Override
        protected void layoutChildren(){
            double w = getWidth();
            double h = getHeight();
            double toolbarHeight = toolbar.prefHeight(w);
            layoutInArea(webView, 0, 0, w, h-toolbarHeight, 0, HPos.CENTER, VPos.CENTER);
            layoutInArea(toolbar, 0, h-toolbarHeight, w, toolbarHeight, 0, HPos.CENTER, VPos.CENTER);
        }

    }

}
Related:
- Communication between JavaFX and JavaScript inside WebView, using JSObject
Tuesday, March 27, 2012
Execute JavaScript in WebView from Java code
JavaFX WebView provide a executeScript() method, it can execute Javascript in html code currently loaded in WebView.

It's a example demonstrate how to call Javascript function with and without parameter passed, from Java code.
hello.html
Related:
- OnAlert EventHandler of WebEngine.
- Communication between JavaFX and JavaScript inside WebView, using JSObject.

It's a example demonstrate how to call Javascript function with and without parameter passed, from Java code.
package javafx_webview;

import java.net.URL;
import javafx.application.Application;
import javafx.event.ActionEvent;
import javafx.event.EventHandler;
import javafx.geometry.HPos;
import javafx.geometry.Insets;
import javafx.geometry.VPos;
import javafx.scene.Scene;
import javafx.scene.control.Button;
import javafx.scene.control.TextField;
import javafx.scene.layout.HBox;
import javafx.scene.layout.Region;
import javafx.scene.web.WebEngine;
import javafx.scene.web.WebView;
import javafx.stage.Stage;

/**
*
* @web http://java-buddy.blogspot.com/
*/
public class JavaFX_Browser extends Application {

  private Scene scene;
  MyBrowser myBrowser;

  /**
   * @param args the command line arguments
   */
  public static void main(String[] args) {
      launch(args);
  }

  @Override
  public void start(Stage primaryStage) {
      primaryStage.setTitle("java-buddy.blogspot.com");

      myBrowser = new MyBrowser();
      scene = new Scene(myBrowser, 640, 480);

      primaryStage.setScene(scene);
      primaryStage.show();
  }

  class MyBrowser extends Region{

      HBox toolbar;

      WebView webView = new WebView();
      WebEngine webEngine = webView.getEngine();

      public MyBrowser(){

          final URL urlHello = getClass().getResource("hello.html");
          webEngine.load(urlHello.toExternalForm());

          final TextField textField = new TextField ();
          textField.setPromptText("Hello! Who are?");

          Button buttonEnter = new Button("Enter");
          buttonEnter.setOnAction(new EventHandler<ActionEvent>(){

              @Override
              public void handle(ActionEvent arg0) {
                  webEngine.executeScript( " updateHello(' " + textField.getText() + " ') " );
              }
          });

          Button buttonClear = new Button("Clear");
          buttonClear.setOnAction(new EventHandler<ActionEvent>(){

              @Override
              public void handle(ActionEvent arg0) {
                  webEngine.executeScript( "clearHello()" );
              }
          });


          toolbar = new HBox();
          toolbar.setPadding(new Insets(10, 10, 10, 10));
          toolbar.setSpacing(10);
          toolbar.setStyle("-fx-background-color: #336699");
          toolbar.getChildren().addAll(textField, buttonEnter, buttonClear);

          getChildren().add(toolbar);
          getChildren().add(webView);
      }

      @Override
      protected void layoutChildren(){
          double w = getWidth();
          double h = getHeight();
          double toolbarHeight = toolbar.prefHeight(w);
          layoutInArea(webView, 0, 0, w, h-toolbarHeight, 0, HPos.CENTER, VPos.CENTER);
          layoutInArea(toolbar, 0, h-toolbarHeight, w, toolbarHeight, 0, HPos.CENTER, VPos.CENTER);
      }

  }

}
hello.html
<!DOCTYPE html>
<html lang="en-US">
<head>
<meta charset=utf-8>
<title>Hello Java-Buddy!</title>

<script>
function updateHello(user){
  document.getElementById("helloprompt").innerHTML="Hello: " + user;
}

function clearHello(user){
  document.getElementById("helloprompt").innerHTML="Hello <a href='http://java-buddy.blogspot.com/'>Java-Buddy</a>";
}
</script>

</head>
<body>
<img src="https://blogger.googleusercontent.com/img/b/R29vZ2xl/AVvXsEjxGfYYk9MPmsy4Fb5yBONPauX59KlswhZvZL_XoWgvPMp2SwHsLorHIo4aWZJsUc9oynuzwstK5MfzjmjmNevnJFjJt1HIhcl-iRH3dnK2twWSeX6MdjSbAz4nyMzaNQE1p-Pajqfg3KKN/s150/duke_44x80.png"/>
<p id="helloprompt">Hello <a href="http://java-buddy.blogspot.com/">Java-Buddy</a></p>
</body>
</html>
Related:
- OnAlert EventHandler of WebEngine.
- Communication between JavaFX and JavaScript inside WebView, using JSObject.
Free eBook download: Data Structures and Algorithm Analysis, for Java and for C++


The third edition of the textbooks - Data Structures and Algorithm Analysis in Java and Data Structures and Algorithm Analysis in C++, by Clifford A. Shaffer - are now available! The most recent version is Edition 3.2.0.3, dated January 2, 2012.
Download here.
Monday, March 26, 2012
JavaFX 2.0 - TextField

package javafx_ui;

import javafx.application.Application;
import javafx.event.ActionEvent;
import javafx.event.EventHandler;
import javafx.scene.Scene;
import javafx.scene.control.Button;
import javafx.scene.control.Label;
import javafx.scene.control.TextField;
import javafx.scene.layout.HBox;
import javafx.scene.layout.StackPane;
import javafx.scene.layout.VBox;
import javafx.stage.Stage;

/**
*
* @web http://java-buddy.blogspot.com/
*/
public class JavaFX_TextField extends Application {

  /**
   * @param args the command line arguments
   */
  public static void main(String[] args) {
      launch(args);
  }

  @Override
  public void start(Stage primaryStage) {
      primaryStage.setTitle("java-buddy.blogspot.com");

      Label label1 = new Label("TextField:");

      final TextField textField = new TextField ();
      textField.setPromptText("Enter something here...");
      textField.setPrefColumnCount(15);

       final Label label = new Label("hello...");

      Button buttonEnter = new Button("Enter");
      buttonEnter.setOnAction(new EventHandler<ActionEvent>() {

          @Override
          public void handle(ActionEvent arg0) {
              label.setText(textField.getText());
          }
      });

      HBox hBox = new HBox();
      hBox.getChildren().addAll(label1, textField, buttonEnter);
      hBox.setSpacing(10);
      hBox.setMaxHeight(25);

      VBox vBox = new VBox();
      vBox.getChildren().addAll(hBox, label);

      StackPane root = new StackPane();
      root.getChildren().add(vBox);
      primaryStage.setScene(new Scene(root, 300, 250));
      primaryStage.show();
  }
}
Sunday, March 25, 2012
Add toolbar in our browser
Modify from the article "Load local html in JavaFX WebView", a toolbar will be added under the webview in our browser. There are two buttons in the toolbar to load difference pages accordingly.

In this case, a local hello.html is needed, refer to the article "Load local html in JavaFX WebView".

package javafx_webview;

import java.net.URL;
import javafx.application.Application;
import javafx.event.ActionEvent;
import javafx.event.EventHandler;
import javafx.geometry.HPos;
import javafx.geometry.Insets;
import javafx.geometry.VPos;
import javafx.scene.Scene;
import javafx.scene.control.Button;
import javafx.scene.layout.HBox;
import javafx.scene.layout.Region;
import javafx.scene.web.WebEngine;
import javafx.scene.web.WebView;
import javafx.stage.Stage;

/**
*
* @web http://java-buddy.blogspot.com/
*/
public class JavaFX_Browser extends Application {

   private Scene scene;
   MyBrowser myBrowser;

   /**
    * @param args the command line arguments
    */
   public static void main(String[] args) {
       launch(args);
   }

   @Override
   public void start(Stage primaryStage) {
       primaryStage.setTitle("java-buddy.blogspot.com");

       myBrowser = new MyBrowser();
       scene = new Scene(myBrowser, 640, 480);

       primaryStage.setScene(scene);
       primaryStage.show();
   }

   class MyBrowser extends Region{

       HBox toolbar;

       WebView webView = new WebView();
       WebEngine webEngine = webView.getEngine();

       public MyBrowser(){

           final URL urlHello = getClass().getResource("hello.html");
           webEngine.load(urlHello.toExternalForm());

           Button buttonJavaBuddy = new Button("Java-Buddy");
           buttonJavaBuddy.setOnAction(new EventHandler<ActionEvent>(){

               @Override
               public void handle(ActionEvent arg0) {
                   webEngine.load("http://java-buddy.blogspot.com/");
               }
           });

           Button buttonHello = new Button("hello.html");
           buttonHello.setOnAction(new EventHandler<ActionEvent>(){

               @Override
               public void handle(ActionEvent arg0) {
                   webEngine.load(urlHello.toExternalForm());
               }
           });

           toolbar = new HBox();
           toolbar.setPadding(new Insets(10, 10, 10, 10));
           toolbar.setSpacing(10);
           toolbar.setStyle("-fx-background-color: #336699");
           toolbar.getChildren().addAll(buttonJavaBuddy,buttonHello);

           getChildren().add(toolbar);
           getChildren().add(webView);
       }

       protected void layoutChildren(){
           double w = getWidth();
           double h = getHeight();
           double toolbarHeight = toolbar.prefHeight(w);
           layoutInArea(webView, 0, 0, w, h-toolbarHeight, 0, HPos.CENTER, VPos.CENTER);
           layoutInArea(toolbar, 0, h-toolbarHeight, w, toolbarHeight, 0, HPos.CENTER, VPos.CENTER);
       }

   }

}
In this case, a local hello.html is needed, refer to the article "Load local html in JavaFX WebView".
Saturday, March 24, 2012
Free Online eBook: Introduction to Programming in Java
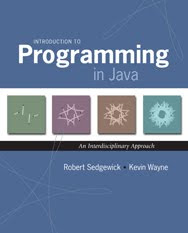
Introduction to Programming in Java is a textbook for a first course in computer science for the next generation of scientists and engineers. It is free to read online.
The textbook Introduction to Programming in Java is an interdisciplinary approach to the traditional CS1 curriculum. We teach all of the classic elements of programming, using an "objects-in-the-middle" approach that emphasizes data abstraction. A key feature of the book is the manner in which we motivate each programming concept by examining its impact on specific applications, taken from fields ranging from materials science to genomics to astrophysics to internet commerce. The book is organized around four stages of learning to program:
- Chapter 1: Elements of Programming introduces variables; assignment statements; built-in types of data; conditionals and loops; arrays; and input/output, including graphics and sound.
- Chapter 2: Functions introduces modular programming. We stress the fundamental idea of dividing a program into components that can be independently debugged, maintained, and reused.
- Chapter 3: Object-Oriented Programming introduces data abstraction. We emphasize the concept of a data type and its implementation using Java's class mechanism.
- Chapter 4: Algorithms and Data Structures introduces classical algorithms for sorting and searching, and fundamental data structures, including stacks, queues, and symbol tables.
Introduction to Programming in Java online
Friday, March 23, 2012
Generate and load html content dynamically using Java code
In this example, the html content in WebView is generated in run-time by Java code dynamically.

Related:
- Load local html in JavaFX WebView
- Add toolbar in our browser

package javafx_webview;

import javafx.application.Application;
import javafx.scene.Scene;
import javafx.scene.layout.Region;
import javafx.scene.web.WebEngine;
import javafx.scene.web.WebView;
import javafx.stage.Stage;

/**
*
* @web http://java-buddy.blogspot.com/
*/
public class JavaFX_Browser extends Application {

 private Scene scene;
 MyBrowser myBrowser;

 /**
  * @param args the command line arguments
  */
 public static void main(String[] args) {
     launch(args);
 }

 @Override
 public void start(Stage primaryStage) {
     primaryStage.setTitle("java-buddy.blogspot.com");

     myBrowser = new MyBrowser();
     scene = new Scene(myBrowser, 640, 480);

     primaryStage.setScene(scene);
     primaryStage.show();
 }

 class MyBrowser extends Region{

     WebView webView = new WebView();
     WebEngine webEngine = webView.getEngine();

     public MyBrowser(){

         webEngine.loadContent(genHtml());

         getChildren().add(webView);
     }
 }

 private String genHtml(){

     StringBuilder tHtml = new StringBuilder();

     tHtml.append("<DOCTYPE html>" + "\n");
     tHtml.append("<html lang='en-US'>" + "\n");
     tHtml.append("<head>" + "\n");
     tHtml.append("<meta charset=utf-8>" + "\n");
     tHtml.append("<title>Hello Java-Buddy!</title>" + "\n");
     tHtml.append("</head>" + "\n");
     tHtml.append("<body>" + "\n");
     tHtml.append("<p>Hello <a href='http://java-buddy.blogspot.com/'>Java-Buddy</a></p>" + "\n");
     tHtml.append("<img src='https://blogger.googleusercontent.com/img/b/R29vZ2xl/AVvXsEjxGfYYk9MPmsy4Fb5yBONPauX59KlswhZvZL_XoWgvPMp2SwHsLorHIo4aWZJsUc9oynuzwstK5MfzjmjmNevnJFjJt1HIhcl-iRH3dnK2twWSeX6MdjSbAz4nyMzaNQE1p-Pajqfg3KKN/s150/duke_44x80.png'/>" + "\n");
     tHtml.append("</body>" + "\n");
     tHtml.append("</html>" + "\n");

     return tHtml.toString();
 }
}
Related:
- Load local html in JavaFX WebView
- Add toolbar in our browser
Thursday, March 22, 2012
Load local html in JavaFX WebView
To load local html web page in WebView, we can use the code:
URL urlHello = getClass().getResource(hellohtml);
webEngine.load(urlHello.toExternalForm());

Create a simple local web page, hello.html.
Related:
- Generate and load html content dynamically using Java code
- Add toolbar in our browser
URL urlHello = getClass().getResource(hellohtml);
webEngine.load(urlHello.toExternalForm());

Create a simple local web page, hello.html.
<!DOCTYPE html>
<html lang="en-US">
<head>
<meta charset=utf-8>
<title>Hello Java-Buddy!</title>
</head>
<body>
<img src="https://blogger.googleusercontent.com/img/b/R29vZ2xl/AVvXsEjxGfYYk9MPmsy4Fb5yBONPauX59KlswhZvZL_XoWgvPMp2SwHsLorHIo4aWZJsUc9oynuzwstK5MfzjmjmNevnJFjJt1HIhcl-iRH3dnK2twWSeX6MdjSbAz4nyMzaNQE1p-Pajqfg3KKN/s150/duke_44x80.png"/>
<p>Hello <a href="http://java-buddy.blogspot.com/">Java-Buddy</a></p>
</body>
</html>
package javafx_webview;

import java.net.URL;
import javafx.application.Application;
import javafx.scene.Scene;
import javafx.scene.layout.Region;
import javafx.scene.web.WebEngine;
import javafx.scene.web.WebView;
import javafx.stage.Stage;

/**
*
* @web http://java-buddy.blogspot.com/
*/
public class JavaFX_Browser extends Application {

private Scene scene;
MyBrowser myBrowser;

/**
 * @param args the command line arguments
 */
public static void main(String[] args) {
    launch(args);
}

@Override
public void start(Stage primaryStage) {
    primaryStage.setTitle("java-buddy.blogspot.com");

    myBrowser = new MyBrowser();
    scene = new Scene(myBrowser, 640, 480);

    primaryStage.setScene(scene);
    primaryStage.show();
}

class MyBrowser extends Region{

    final String hellohtml = "hello.html";

    WebView webView = new WebView();
    WebEngine webEngine = webView.getEngine();

    public MyBrowser(){

        URL urlHello = getClass().getResource("hello.html");
        webEngine.load(urlHello.toExternalForm());

        getChildren().add(webView);
    }
}
}
Related:
- Generate and load html content dynamically using Java code
- Add toolbar in our browser
Wednesday, March 21, 2012
Create custom browser class to embed WebView
Previous article demonstrate how to "Create web browser with JavaFX 2.0 WebView" by instancing a WebView object. It's modify to create a new class, MyBrowser, extends Region, and embed a WebView inside, such that we can easy customize our MyBrowser in the future.


package javafx_webview;

import javafx.application.Application;
import javafx.scene.Scene;
import javafx.scene.layout.Region;
import javafx.scene.web.WebEngine;
import javafx.scene.web.WebView;
import javafx.stage.Stage;

/**
*
* @web http://java-buddy.blogspot.com/
*/
public class JavaFX_Browser extends Application {

  private Scene scene;
  MyBrowser myBrowser;

  /**
   * @param args the command line arguments
   */
  public static void main(String[] args) {
      launch(args);
  }

  @Override
  public void start(Stage primaryStage) {
      primaryStage.setTitle("java-buddy.blogspot.com");

      myBrowser = new MyBrowser();
      scene = new Scene(myBrowser, 640, 480);

      primaryStage.setScene(scene);
      primaryStage.show();
  }

  class MyBrowser extends Region{

      final String HOME = "http://java-buddy.blogspot.com/";
      WebView webView = new WebView();
      WebEngine webEngine = webView.getEngine();


      public MyBrowser(){

          webEngine.load(HOME);

          getChildren().add(webView);
      }
  }
}
Tuesday, March 20, 2012
Create web browser with JavaFX 2.0 WebView
JavaFX 2.0 provide WebView, a full function web browser based on WebKit, an open source web browser engine. It supports Cascading Style Sheets (CSS), JavaScript, Document Object Model (DOM), and HTML5 features of rendering canvas and timed media playback.

Next:
- Create custom browser class to embed WebView

/*
* To change this template, choose Tools | Templates
* and open the template in the editor.
*/
package javafx_webview;

import javafx.application.Application;
import javafx.scene.Scene;
import javafx.scene.layout.StackPane;
import javafx.scene.web.WebEngine;
import javafx.scene.web.WebView;
import javafx.stage.Stage;

/**
*
* @web http://java-buddy.blogspot.com/
*/
public class JavaFX_Browser extends Application {

  /**
   * @param args the command line arguments
   */
  public static void main(String[] args) {
      launch(args);
  }

  @Override
  public void start(Stage primaryStage) {
      primaryStage.setTitle("java-buddy.blogspot.com");

      WebView myBrowser = new WebView();
      WebEngine myWebEngine = myBrowser.getEngine();
      myWebEngine.load("http://java-buddy.blogspot.com/");

      StackPane root = new StackPane();
      root.getChildren().add(myBrowser);
      primaryStage.setScene(new Scene(root, 640, 480));
      primaryStage.show();
  }
}
Next:
- Create custom browser class to embed WebView
Friday, March 16, 2012
JavaFX 2.0: Implement Source and Target of Drag and Drop for Image
In the previous article "JavaFX 2.0: Implement GestureTarget of Drag and Drop for Image", I implement GestureTarget for Image - in form of file.
In this exercise, I TRY to implement both GestureSource and GestureTarget, in form of Image - The image is pass by putImage() and getImage() methods, instead of putFiles() and getFiles().
BUT, THERE IS A BUG:
After draged to copy a Image, then drag the copied Image, "java.lang.IllegalArgumentException: Wrong byte buffer size 44x80 [14080] != 0" will be thrown.
Up to this writing, I have no any solution!
In this exercise, I TRY to implement both GestureSource and GestureTarget, in form of Image - The image is pass by putImage() and getImage() methods, instead of putFiles() and getFiles().
package javafx_draganddrop_image;

import java.io.File;
import javafx.application.Application;
import javafx.event.EventHandler;
import javafx.scene.Group;
import javafx.scene.Scene;
import javafx.scene.image.Image;
import javafx.scene.image.ImageView;
import javafx.scene.image.ImageViewBuilder;
import javafx.scene.input.*;
import javafx.scene.layout.HBox;
import javafx.scene.layout.VBox;
import javafx.stage.Stage;

/**
 *
 * @web http://java-buddy.blogspot.com/
 */
public class JavaFX_DragAndDrop_image extends Application {

    /**
     * @param args the command line arguments
     */
    public static void main(String[] args) {
        launch(args);
    }

    @Override
    public void start(Stage primaryStage) {
        primaryStage.setTitle("java-buddy.blogspot.com");
        Group root = new Group();
        Scene scene = new Scene(root, 400, 400);

        HBox hBox1 = new HBox();
        hBox1.setPrefWidth(400);
        hBox1.setPrefHeight(200);
        hBox1.setStyle("-fx-border-color: red;"
              + "-fx-border-width: 1;"
              + "-fx-border-style: solid;");

        HBox hBox2 = new HBox();
        hBox2.setPrefWidth(400);
        hBox2.setPrefHeight(200);
        hBox2.setStyle("-fx-border-color: blue;"
              + "-fx-border-width: 1;"
              + "-fx-border-style: solid;");

        insertImage(new Image(getClass().getResourceAsStream("duke_44x80.png")), hBox1);
        insertImage(new Image(getClass().getResourceAsStream("duke_44x80_flip.png")), hBox2);

        setupGestureTarget(hBox1);
        setupGestureTarget(hBox2);

        VBox vBox = new VBox();
        vBox.getChildren().addAll(hBox1, hBox2);
        root.getChildren().addAll(vBox);

        primaryStage.setScene(scene);
        primaryStage.show();
        primaryStage.show();
    }

    void insertImage(Image i, HBox hb){

        ImageView iv = new ImageView();
        iv.setImage(i);

        setupGestureSource(iv);
        hb.getChildren().add(iv);
    }


    void setupGestureTarget(final HBox targetBox){

        targetBox.setOnDragOver(new EventHandler <DragEvent>() {
            @Override
            public void handle(DragEvent event) {

                Dragboard db = event.getDragboard();

                if(db.hasImage()){
                    event.acceptTransferModes(TransferMode.COPY);
                }

                event.consume();
            }
        });

        targetBox.setOnDragDropped(new EventHandler <DragEvent>() {
            @Override
            public void handle(DragEvent event) {

                Dragboard db = event.getDragboard();

                if(db.hasImage()){

                    insertImage(db.getImage(), targetBox);

                    event.setDropCompleted(true);
                }else{
                    event.setDropCompleted(false);
                }

                event.consume();
            }
        });

    }

    void setupGestureSource(final ImageView source){

        source.setOnDragDetected(new EventHandler <MouseEvent>() {
           @Override
           public void handle(MouseEvent event) {

               /* allow any transfer mode */
               Dragboard db = source.startDragAndDrop(TransferMode.COPY);

               /* put a image on dragboard */
               ClipboardContent content = new ClipboardContent();

               Image sourceImage = source.getImage();
               content.putImage(sourceImage);
               db.setContent(content);

               event.consume();
           }
       });

    }
}
BUT, THERE IS A BUG:
After draged to copy a Image, then drag the copied Image, "java.lang.IllegalArgumentException: Wrong byte buffer size 44x80 [14080] != 0" will be thrown.
Up to this writing, I have no any solution!
Thursday, March 15, 2012
JavaFX 2.0: Rectangle and RectangleBuilder
Update: RectangleBuilder is deprecated and will be removed in the next version. Please read JavaFX 8 Rectangle example.


package javafx_rect;

import javafx.application.Application;
import javafx.scene.Group;
import javafx.scene.Scene;
import javafx.scene.paint.Color;
import javafx.scene.shape.Rectangle;
import javafx.scene.shape.RectangleBuilder;
import javafx.stage.Stage;

/**
*
* @web http://java-buddy.blogspot.com/
*/
public class JavaFX_Rect extends Application {

  /**
   * @param args the command line arguments
   */
  public static void main(String[] args) {
      launch(args);
  }

  @Override
  public void start(Stage primaryStage) {
      primaryStage.setTitle("java-buddy.blogspot.com");

      Rectangle rect1 = new Rectangle(10, 10, 280, 130);
      rect1.setFill(Color.BLUE);
      rect1.setStrokeWidth(3);
      rect1.setStroke(Color.BLACK);

      Rectangle rect2 = RectangleBuilder.create()
              .arcWidth(30)
              .arcHeight(30)
              .fill(Color.WHITESMOKE)
              .x(10)
              .y(160)
              .strokeWidth(3)
              .stroke(Color.BLACK)
              .build();
      rect2.setWidth(280);
      rect2.setHeight(130);

      Group root = new Group();
      root.getChildren().addAll(rect1, rect2);
      primaryStage.setScene(new Scene(root, 300, 300));
      primaryStage.show();
  }
}
Wednesday, March 14, 2012
JavaFX 2.0: Implement GestureTarget of Drag and Drop for Image
This article demonstrate how to implement GestureTarget of Drag and Drop for Image. When a image is drag over and drop on the scene, it will be copy in a ImageView, and add to a HBox in the scene.
Related article:
- JavaFX 2.0: drag-and-drop gesture for text
- JavaFX 2.0: Implement Source and Target of Drag and Drop for Image
package javafx_draganddrop;
import java.io.File;
import javafx.application.Application;
import javafx.event.EventHandler;
import javafx.scene.Group;
import javafx.scene.Scene;
import javafx.scene.image.Image;
import javafx.scene.image.ImageView;
import javafx.scene.input.DragEvent;
import javafx.scene.input.Dragboard;
import javafx.scene.input.TransferMode;
import javafx.scene.layout.HBox;
import javafx.stage.Stage;

/**
 *
 * @web http://java-buddy.blogspot.com/
 */
public class JavaFX_DragAndDrop extends Application {

    /**
     * @param args the command line arguments
     */
    public static void main(String[] args) {
        launch(args);
    }

    @Override
    public void start(Stage primaryStage) {
        primaryStage.setTitle("java-buddy.blogspot.com");
        Group root = new Group();
        Scene scene = new Scene(root, 350, 300);

        HBox hBox = new HBox();

        setupGestureTarget(scene, hBox);

        root.getChildren().add(hBox);
        primaryStage.setScene(scene);
        primaryStage.show();
        primaryStage.show();
    }

    void setupGestureTarget(final Scene target, final HBox targetBox){

        target.setOnDragOver(new EventHandler <DragEvent>() {
            @Override
            public void handle(DragEvent event) {
                /* data is dragged over the target */
                System.out.println("onDragOver");

                Dragboard db = event.getDragboard();
                if(db.hasFiles()){
                    event.acceptTransferModes(TransferMode.COPY);
                }

                event.consume();
            }
        });

        target.setOnDragDropped(new EventHandler <DragEvent>() {
            @Override
            public void handle(DragEvent event) {
                /* data dropped */
                System.out.println("onDragDropped");

                Dragboard db = event.getDragboard();

                if(db.hasFiles()){

                    for(File file:db.getFiles()){
                        String absolutePath = file.getAbsolutePath();
                        Image dbimage = new Image(absolutePath);
                        ImageView dbImageView = new ImageView();
                        dbImageView.setImage(dbimage);
                        targetBox.getChildren().add(dbImageView);
                    }

                    event.setDropCompleted(true);
                }else{
                    event.setDropCompleted(false);
                }

                event.consume();
            }
        });

    }
}
Related article:
- JavaFX 2.0: drag-and-drop gesture for text
- JavaFX 2.0: Implement Source and Target of Drag and Drop for Image
Tuesday, March 13, 2012
JavaFX 2.0: drag-and-drop gesture
A drag-and-drop operation is a data transfer between two objects: a gesture source and a gesture target. The gesture source and gesture target can be the following objects:
- Nodes
- Scenes
The gesture source and gesture target can belong to a single JavaFX application or to two different JavaFX or Java Client applications. Moreover, drag-and-drop can be implemented between a JavaFX application and a third-party (native) application such as Windows Explorer or a desktop.
Example:
In this example, we create four Text object. All of them are set as both drag-and-drop source and target.
Reference: http://docs.oracle.com/javafx/2.0/drag_drop/jfxpub-drag_drop.htm
More demonstration of JavaFX 2.0 drag-and-drop:
Between two copy of the same JavaFX 2.0 application.
Between JavaFX 2.0 application and Google Chrome.
Related article:
- JavaFX 2.0: Implement GestureTarget of Drag and Drop for Image
- Nodes
- Scenes
The gesture source and gesture target can belong to a single JavaFX application or to two different JavaFX or Java Client applications. Moreover, drag-and-drop can be implemented between a JavaFX application and a third-party (native) application such as Windows Explorer or a desktop.
Example:
In this example, we create four Text object. All of them are set as both drag-and-drop source and target.
package javafx_draganddrop;

import javafx.application.Application;
import javafx.event.EventHandler;
import javafx.scene.Group;
import javafx.scene.Scene;
import javafx.scene.input.*;
import javafx.scene.paint.Color;
import javafx.scene.text.Text;
import javafx.stage.Stage;

/**
*
* @web http://java-buddy.blogspot.com/
*/
public class JavaFX_DragAndDrop extends Application {

   /**
    * @param args the command line arguments
    */
   public static void main(String[] args) {
       launch(args);
   }

   @Override
   public void start(Stage primaryStage) {
       primaryStage.setTitle("java-buddy.blogspot.com");
       Group root = new Group();
       Scene scene = new Scene(root, 350, 300);

       final Text text1 = new Text(50, 100, "TEXT 1");
       text1.setScaleX(2.0);
       text1.setScaleY(2.0);

       final Text text2 = new Text(250, 100, "TEXT 2");
       text2.setScaleX(2.0);
       text2.setScaleY(2.0);

       final Text text3 = new Text(50, 200, "TEXT 3");
       text3.setScaleX(2.0);
       text3.setScaleY(2.0);

       final Text text4 = new Text(250, 200, "TEXT 4");
       text4.setScaleX(2.0);
       text4.setScaleY(2.0);

       setupGestureSource(text1);
       setupGestureTarget(text1);
       setupGestureSource(text2);
       setupGestureTarget(text2);
       setupGestureSource(text3);
       setupGestureTarget(text3);
       setupGestureSource(text4);
       setupGestureTarget(text4);

       root.getChildren().addAll(text1, text2, text3, text4);
       primaryStage.setScene(scene);
       primaryStage.show();
       primaryStage.show();
   }

   void setupGestureSource(final Text source){

       source.setOnDragDetected(new EventHandler <MouseEvent>() {
           @Override
           public void handle(MouseEvent event) {
               /* drag was detected, start drag-and-drop gesture*/
               System.out.println("onDragDetected");

               /* allow any transfer mode */
               Dragboard db = source.startDragAndDrop(TransferMode.ANY);

               /* put a string on dragboard */
               ClipboardContent content = new ClipboardContent();
               content.putString(source.getText());
               db.setContent(content);

               event.consume();
           }
       });

       source.setOnDragDone(new EventHandler <DragEvent>() {
           @Override
           public void handle(DragEvent event) {
               /* the drag-and-drop gesture ended */
               System.out.println("onDragDone");
               /* if the data was successfully moved, clear it */
               if (event.getTransferMode() == TransferMode.MOVE) {
                   source.setText("");
               }

               event.consume();
           }
       });

   }

   void setupGestureTarget(final Text target){

       target.setOnDragOver(new EventHandler <DragEvent>() {
           @Override
           public void handle(DragEvent event) {
               /* data is dragged over the target */
               System.out.println("onDragOver");

               /* accept it only if it is  not dragged from the same node
                * and if it has a string data */
               if (event.getGestureSource() != target &&
                       event.getDragboard().hasString()) {
                   /* allow for both copying and moving, whatever user chooses */
                   event.acceptTransferModes(TransferMode.COPY_OR_MOVE);
               }

               event.consume();
           }
       });

       target.setOnDragEntered(new EventHandler <DragEvent>() {
           @Override
           public void handle(DragEvent event) {
               /* the drag-and-drop gesture entered the target */
               System.out.println("onDragEntered");
               /* show to the user that it is an actual gesture target */
               if (event.getGestureSource() != target &&
                       event.getDragboard().hasString()) {
                   target.setFill(Color.GREEN);
               }

               event.consume();
           }
       });

       target.setOnDragExited(new EventHandler <DragEvent>() {
           @Override
           public void handle(DragEvent event) {
               /* mouse moved away, remove the graphical cues */
               target.setFill(Color.BLACK);

               event.consume();
           }
       });

       target.setOnDragDropped(new EventHandler <DragEvent>() {
           @Override
           public void handle(DragEvent event) {
               /* data dropped */
               System.out.println("onDragDropped");
               /* if there is a string data on dragboard, read it and use it */
               Dragboard db = event.getDragboard();
               boolean success = false;
               if (db.hasString()) {
                   target.setText(target.getText() + "\n" + db.getString());
                   success = true;
               }
               /* let the source know whether the string was successfully
                * transferred and used */
               event.setDropCompleted(success);

               event.consume();
           }
       });

   }
}
Reference: http://docs.oracle.com/javafx/2.0/drag_drop/jfxpub-drag_drop.htm
More demonstration of JavaFX 2.0 drag-and-drop:
Between two copy of the same JavaFX 2.0 application.
Between JavaFX 2.0 application and Google Chrome.
Related article:
- JavaFX 2.0: Implement GestureTarget of Drag and Drop for Image
Monday, March 12, 2012
How to run JavaFX application as a standalone program
In NetBeans, the generated executable Jar File is available on a local drive. Such as(in Windows):
C:\Users\Seven\Documents\NetBeansProjects\JavaFX_Path\dist\JavaFX_Path.jar
It can be launched by:
C:\Users\Seven\Documents\NetBeansProjects\JavaFX_Path\dist\JavaFX_Path.jar
It can be launched by:
- Open cmd window.
Switch to the destination directory.
type: java -jar JavaFX_Path.jar.
- Open File Browser.
Switch to the destination directory.
Double click the application JAR file.


Saturday, March 10, 2012
FREE JDK 7 Reference Card

Get an at-a-glance look at all the information you need to prepare for and use the Java SE 7 Platform Specification (aka Java 7 or JDK 7). The JDK 7 Reference Card is a comprehensive reference tool for all the newly included, enhanced and changed JSRs that make up the Java 7 spec — everything from NIO.2 to Project Coin — as well as tidbits like the fate of closures.
Get your JDK 7 Reference Card for FREE here.
JavaFX 2.0: Example of MediaPlay
package javafx_media;

import javafx.application.Application;
import javafx.scene.Group;
import javafx.scene.Scene;
import javafx.scene.media.Media;
import javafx.scene.media.MediaPlayer;
import javafx.scene.media.MediaView;
import javafx.stage.Stage;

/**
 *
 * @web http://java-buddy.blogspot.com/
 */
public class JavaFX_VideoPlayer extends Application {

    private static final String MEDIA_URL = "http://download.oracle.com/otndocs/products/javafx/oow2010-2.flv";
     private static String arg1;

    /**
     * @param args the command line arguments
     */
    public static void main(String[] args) {
        launch(args);
    }

    @Override
    public void start(Stage primaryStage) {
        primaryStage.setTitle("java-buddy.blogspot.com/");

        Group root = new Group();
        Scene scene = new Scene(root, 540, 210);

        // create media player
        Media media = new Media((arg1 != null) ? arg1 : MEDIA_URL);
        MediaPlayer mediaPlayer = new MediaPlayer(media);
        mediaPlayer.setAutoPlay(true);

        // create mediaView and add media player to the viewer
        MediaView mediaView = new MediaView(mediaPlayer);
        ((Group)scene.getRoot()).getChildren().add(mediaView);

        primaryStage.setScene(scene);
        primaryStage.show();
    }
}
Actually, it's a example preovided from Oracle JavaFX 2.0 Doc here.
Related:
- Embed JavaFX inside Swing JFrame
JavaFX 2.0: Implement OnMouseClicked EventHandler for ListView

package javafx_ui;

import javafx.application.Application;
import javafx.collections.FXCollections;
import javafx.collections.ObservableList;
import javafx.event.EventHandler;
import javafx.scene.Scene;
import javafx.scene.control.Label;
import javafx.scene.control.ListView;
import javafx.scene.input.MouseEvent;
import javafx.scene.layout.StackPane;
import javafx.scene.layout.VBox;
import javafx.stage.Stage;

/**
*
* @web http://java-buddy.blogspot.com/
*/
public class JavaFX_ui extends Application {

  /**
   * @param args the command line arguments
   */
  public static void main(String[] args) {
      launch(args);
  }

  @Override
  public void start(Stage primaryStage) {

      primaryStage.setTitle("http://java-buddy.blogspot.com/");

      final Label label = new Label("Selected: ");

      final ListView<String> listView = new ListView<>();
      ObservableList<String> list =FXCollections.observableArrayList (
              "Sunday",
              "Monday",
              "Tuesday",
              "Wednesday",
              "Thursday",
              "Friday",
              "Saturday");
      listView.setItems(list);

      listView.setOnMouseClicked(new EventHandler<MouseEvent>(){

          @Override
          public void handle(MouseEvent arg0) {

              label.setText("Selected: " +
                  listView.getSelectionModel().getSelectedItems());
          }

      });

      VBox vBox = new VBox();
      vBox.getChildren().addAll(label, listView);

      StackPane root = new StackPane();
      root.getChildren().add(vBox);
      primaryStage.setScene(new Scene(root, 300, 250));
      primaryStage.show();
  }
}
Friday, March 9, 2012
JavaFX 2.0 - FileChooser.showOpenMultipleDialog() and display the returned files in a ListView.
/*
* To change this template, choose Tools | Templates
* and open the template in the editor.
*/
package javafx_filechooser;

import java.io.File;
import java.util.List;
import javafx.application.Application;
import javafx.collections.FXCollections;
import javafx.collections.ObservableList;
import javafx.event.ActionEvent;
import javafx.event.EventHandler;
import javafx.scene.Scene;
import javafx.scene.control.Button;
import javafx.scene.control.Label;
import javafx.scene.control.ListView;
import javafx.scene.layout.StackPane;
import javafx.scene.layout.VBox;
import javafx.stage.FileChooser;
import javafx.stage.Stage;

/**
*
* @author Seven
*/
public class JavaFX_FileChooser extends Application {

   File file;
   ListView<String> listView;
   ObservableList<String> list;
   List<File> fileList;

   /**
    * @param args the command line arguments
    */
   public static void main(String[] args) {
       launch(args);
   }

   @Override
   public void start(final Stage primaryStage) {
       primaryStage.setTitle("Hello World!");

       listView = new ListView<>();
       list =FXCollections.observableArrayList ();

       final Label labelFile = new Label();

       Button btn = new Button();
       btn.setText("Open FileChooser'");
       btn.setOnAction(new EventHandler<ActionEvent>() {

           @Override
           public void handle(ActionEvent event) {
               FileChooser fileChooser = new FileChooser();

               //Open directory from existing directory
               if( fileList != null ){
                   if( !fileList.isEmpty() ){
                       File existDirectory = fileList.get(0).getParentFile();
                       fileChooser.setInitialDirectory(existDirectory);
                   }
               }

               //Set extension filter
               FileChooser.ExtensionFilter extFilter = new FileChooser.ExtensionFilter("AVI files (*.avi)", "*.avi");
               fileChooser.getExtensionFilters().add(extFilter);

               //Show open file dialog, with primaryStage blocked.

               fileList = fileChooser.showOpenMultipleDialog(primaryStage);

               list.clear();
               for(int i=0; i<fileList.size(); i++){
                   list.add(fileList.get(i).getPath());
               }

               listView.setItems(list);

           }
       });

       VBox vBox = new VBox();
       vBox.getChildren().addAll(labelFile, btn);

       vBox.getChildren().add(listView);

       StackPane root = new StackPane();
       root.getChildren().add(vBox);
       primaryStage.setScene(new Scene(root, 300, 250));
       primaryStage.show();
   }
}
Related article:
- Use FileChooser.showOpenDialog() to open single file.
- Read text file with JavaFX FileChooser
JavaFX 2.0 - Disable owner window for FileChooser
In last article "JavaFX 2.0: FileChooser, set initial directory from last directory", showOpenDialog(Window ownerWindow) was called with ownerWindow of "null". Such that the user can touch the parent window and re-open another FileChooser, can cause error!
We can pass the owner window, primaryStage, to showOpenDialog(primaryStage). Such that it will be blocked while the file dialog is being shown.
Related article:
- Use FileChooser.showOpenMultipleDialog() to open multi files.
We can pass the owner window, primaryStage, to showOpenDialog(primaryStage). Such that it will be blocked while the file dialog is being shown.
/*
 * To change this template, choose Tools | Templates
 * and open the template in the editor.
 */
package javafx_filechooser;

import java.io.File;
import javafx.application.Application;
import javafx.event.ActionEvent;
import javafx.event.EventHandler;
import javafx.scene.Scene;
import javafx.scene.control.Button;
import javafx.scene.control.Label;
import javafx.scene.layout.StackPane;
import javafx.scene.layout.VBox;
import javafx.stage.FileChooser;
import javafx.stage.Stage;

/**
 *
 * @author Seven
 */
public class JavaFX_FileChooser extends Application {

    File file;

    /**
     * @param args the command line arguments
     */
    public static void main(String[] args) {
        launch(args);
    }

    @Override
    public void start(final Stage primaryStage) {
        primaryStage.setTitle("Hello World!");

        final Label labelFile = new Label();

        Button btn = new Button();
        btn.setText("Open FileChooser'");
        btn.setOnAction(new EventHandler<ActionEvent>() {

            @Override
            public void handle(ActionEvent event) {
                FileChooser fileChooser = new FileChooser();

                //Open directory from existing directory
                if(file != null){
                    File existDirectory = file.getParentFile();
                    fileChooser.setInitialDirectory(existDirectory);
                }

                //Set extension filter
                FileChooser.ExtensionFilter extFilter = new FileChooser.ExtensionFilter("AVI files (*.avi)", "*.avi");
                fileChooser.getExtensionFilters().add(extFilter);

                //Show open file dialog, with primaryStage blocked.
                file = fileChooser.showOpenDialog(primaryStage);

                labelFile.setText(file.getPath());
            }
        });

        VBox vBox = new VBox();
        vBox.getChildren().addAll(labelFile, btn);

        StackPane root = new StackPane();
        root.getChildren().add(vBox);
        primaryStage.setScene(new Scene(root, 300, 250));
        primaryStage.show();
    }
}
Related article:
- Use FileChooser.showOpenMultipleDialog() to open multi files.
Thursday, March 8, 2012
JavaFX 2.0: FileChooser, set initial directory from last directory
To open FileChooser from a given directory, we can usse the function fileChooser.setInitialDirectory(existDirectory).
Further work from last article "JavaFX 2.0: FileChooser - Open File Dialog".

Next:
- JavaFX 2.0 - Disable ower window for FileChooser
Further work from last article "JavaFX 2.0: FileChooser - Open File Dialog".
/*
 * To change this template, choose Tools | Templates
 * and open the template in the editor.
 */
package javafx_filechooser;

import java.io.File;
import javafx.application.Application;
import javafx.event.ActionEvent;
import javafx.event.EventHandler;
import javafx.scene.Scene;
import javafx.scene.control.Button;
import javafx.scene.control.Label;
import javafx.scene.layout.StackPane;
import javafx.scene.layout.VBox;
import javafx.stage.FileChooser;
import javafx.stage.Stage;

/**
 *
 * @author Seven
 */
public class JavaFX_FileChooser extends Application {

    File file;

    /**
     * @param args the command line arguments
     */
    public static void main(String[] args) {
        launch(args);
    }

    @Override
    public void start(Stage primaryStage) {
        primaryStage.setTitle("Hello World!");

        final Label labelFile = new Label();

        Button btn = new Button();
        btn.setText("Open FileChooser'");
        btn.setOnAction(new EventHandler<ActionEvent>() {

            @Override
            public void handle(ActionEvent event) {
                FileChooser fileChooser = new FileChooser();

                //Open directory from existing directory
                if(file != null){
                    File existDirectory = file.getParentFile();
                    fileChooser.setInitialDirectory(existDirectory);
                }

                //Set extension filter
                FileChooser.ExtensionFilter extFilter = new FileChooser.ExtensionFilter("AVI files (*.avi)", "*.avi");
                fileChooser.getExtensionFilters().add(extFilter);

                //Show open file dialog
                file = fileChooser.showOpenDialog(null);

                labelFile.setText(file.getPath());
            }
        });

        VBox vBox = new VBox();
        vBox.getChildren().addAll(labelFile, btn);

        StackPane root = new StackPane();
        root.getChildren().add(vBox);
        primaryStage.setScene(new Scene(root, 300, 250));
        primaryStage.show();
    }
}

Next:
- JavaFX 2.0 - Disable ower window for FileChooser
JavaFX 2.0: FileChooser - Open File Dialog

/*
* To change this template, choose Tools | Templates
* and open the template in the editor.
*/
package javafx_filechooser;

import java.io.File;
import javafx.application.Application;
import javafx.event.ActionEvent;
import javafx.event.EventHandler;
import javafx.scene.Scene;
import javafx.scene.control.Button;
import javafx.scene.control.Label;
import javafx.scene.layout.StackPane;
import javafx.scene.layout.VBox;
import javafx.stage.FileChooser;
import javafx.stage.Stage;

/**
*
* @author Seven
*/
public class JavaFX_FileChooser extends Application {

  File file;

  /**
   * @param args the command line arguments
   */
  public static void main(String[] args) {
      launch(args);
  }

  @Override
  public void start(Stage primaryStage) {
      primaryStage.setTitle("Hello World!");

      final Label labelFile = new Label();

      Button btn = new Button();
      btn.setText("Open FileChooser'");
      btn.setOnAction(new EventHandler<ActionEvent>() {

          @Override
          public void handle(ActionEvent event) {
              FileChooser fileChooser = new FileChooser();

              //Set extension filter
              FileChooser.ExtensionFilter extFilter = new FileChooser.ExtensionFilter("AVI files (*.avi)", "*.avi");
              fileChooser.getExtensionFilters().add(extFilter);

              //Show open file dialog
              file = fileChooser.showOpenDialog(null);

              labelFile.setText(file.getPath());
          }
      });

      VBox vBox = new VBox();
      vBox.getChildren().addAll(labelFile, btn);

      StackPane root = new StackPane();
      root.getChildren().add(vBox);
      primaryStage.setScene(new Scene(root, 300, 250));
      primaryStage.show();
  }
}
Next:
- JavaFX 2.0: FileChooser, set initial directory from last directory
Related:
- Save file with JavaFX FileChooser
- Read text file with JavaFX FileChooser
- Use JavaFX FileChooser to open image file, and display on ImageView
- Simple example of DirectoryChooser
- Example of using Swing JFileChooser
Wednesday, March 7, 2012
JavaFX 2.0: Transition along dynamic path
package javafx_path;

import javafx.animation.PathTransition;
import javafx.animation.PathTransitionBuilder;
import javafx.application.Application;
import javafx.event.EventHandler;
import javafx.scene.Group;
import javafx.scene.Scene;
import javafx.scene.image.Image;
import javafx.scene.image.ImageView;
import javafx.scene.input.MouseEvent;
import javafx.scene.paint.Color;
import javafx.scene.shape.LineTo;
import javafx.scene.shape.MoveTo;
import javafx.scene.shape.Path;
import javafx.stage.Stage;
import javafx.util.Duration;

/**
 *
 * @web java-buddy.blogspot.com
 */
public class JavaFX_Path extends Application {

    PathTransition pathTransition;

    /**
     * @param args the command line arguments
     */
    public static void main(String[] args) {
        launch(args);
    }

    @Override
    public void start(Stage primaryStage) {
        primaryStage.setTitle("java-buddy.blogspot.com");
        Group root = new Group();
        Scene scene = new Scene(root, 400, 300, Color.WHITE);

        final Image image1 = new Image(getClass().getResourceAsStream("duke_44x80.png"));
        final ImageView imageView = new ImageView();
        imageView.setImage(image1);

        final Path path = new Path();
        path.setStrokeWidth(1);
        path.setStroke(Color.BLACK);

        //Mouse button pressed - clear path and start from the current X, Y.
        scene.onMousePressedProperty().set(new EventHandler<MouseEvent>(){

            @Override
            public void handle(MouseEvent event) {
                path.getElements().clear();
                path.getElements().add(new MoveTo(event.getX(), event.getY()));
            }
        });

        //Mouse dragged - add current point.
        scene.onMouseDraggedProperty().set(new EventHandler<MouseEvent>(){

            @Override
            public void handle(MouseEvent event) {
                path.getElements().add(new LineTo(event.getX(), event.getY()));
            }
        });

        //Mouse button released,  finish path.
        scene.onMouseReleasedProperty().set(new EventHandler<MouseEvent>(){

            @Override
            public void handle(MouseEvent event) {
                pathTransition = PathTransitionBuilder.create()
                        .node(imageView)
                        .path(path)
                        .duration(Duration.millis(5000))
                        .orientation(PathTransition.OrientationType.ORTHOGONAL_TO_TANGENT)
                        .cycleCount(1)
                        .build();

                pathTransition.play();
            }
        });

        root.getChildren().add(imageView);
        root.getChildren().add(path);
        primaryStage.setScene(scene);
        primaryStage.show();

    }
}
JavaFX 2.0: Create Path dynamically
package javafx_path;

import javafx.application.Application;
import javafx.event.EventHandler;
import javafx.scene.Group;
import javafx.scene.Scene;
import javafx.scene.input.MouseEvent;
import javafx.scene.paint.Color;
import javafx.scene.shape.LineTo;
import javafx.scene.shape.MoveTo;
import javafx.scene.shape.Path;
import javafx.stage.Stage;

/**
 *
 * @web java-buddy.blogspot.com
 */
public class JavaFX_Path extends Application {
    /**
     * @param args the command line arguments
     */
    public static void main(String[] args) {
        launch(args);
    }

    @Override
    public void start(Stage primaryStage) {
        primaryStage.setTitle("java-buddy.blogspot.com");
        Group root = new Group();
        Scene scene = new Scene(root, 400, 300, Color.WHITE);


        final Path path = new Path();
        path.setStrokeWidth(1);
        path.setStroke(Color.BLACK);

        //Mouse button pressed - clear path and start from the current X, Y.
        scene.onMousePressedProperty().set(new EventHandler<MouseEvent>(){

            @Override
            public void handle(MouseEvent event) {
                path.getElements().clear();
                path.getElements().add(new MoveTo(event.getX(), event.getY()));
            }
        });

        //Mouse dragged - add current point.
        scene.onMouseDraggedProperty().set(new EventHandler<MouseEvent>(){

            @Override
            public void handle(MouseEvent event) {
                path.getElements().add(new LineTo(event.getX(), event.getY()));
            }
        });

        //Mouse button released,  finish path.
        scene.onMouseReleasedProperty().set(new EventHandler<MouseEvent>(){

            @Override
            public void handle(MouseEvent event) {

            }
        });

        root.getChildren().add(path);
        primaryStage.setScene(scene);
        primaryStage.show();

    }
}
Monday, March 5, 2012
JavaFX 2.0: PathTransition - transition along path
package javafx_path;

import javafx.animation.PathTransition;
import javafx.animation.PathTransitionBuilder;
import javafx.application.Application;
import javafx.event.ActionEvent;
import javafx.event.EventHandler;
import javafx.scene.Group;
import javafx.scene.Scene;
import javafx.scene.control.Button;
import javafx.scene.image.Image;
import javafx.scene.image.ImageView;
import javafx.scene.paint.Color;
import javafx.scene.shape.LineTo;
import javafx.scene.shape.MoveTo;
import javafx.scene.shape.Path;
import javafx.stage.Stage;
import javafx.util.Duration;

/**
 *
 * @web java-buddy.blogspot.com
 */
public class JavaFX_Path extends Application {
    /**
     * @param args the command line arguments
     */
    public static void main(String[] args) {
        launch(args);
    }

    @Override
    public void start(Stage primaryStage) {
        primaryStage.setTitle("java-buddy.blogspot.com");
        Group root = new Group();
        Scene scene = new Scene(root, 400, 300, Color.WHITE);

        final Image image1 = new Image(getClass().getResourceAsStream("duke_44x80.png"));
        final ImageView imageView = new ImageView();
        imageView.setImage(image1);

        Path path = new Path();
        path.getElements().add(new MoveTo(50, 50));
        path.getElements().add(new LineTo(50, 200));
        path.getElements().add(new LineTo(100, 200));
        path.getElements().add(new LineTo(100, 100));
        path.getElements().add(new LineTo(200, 100));
        path.setStrokeWidth(1);
        path.setStroke(Color.BLACK);

        final PathTransition pathTransition = PathTransitionBuilder.create()
                .node(imageView)
                .path(path)
                .duration(Duration.millis(5000))
                .orientation(PathTransition.OrientationType.ORTHOGONAL_TO_TANGENT)
                .cycleCount(1)
                .build();

        Button btnStart = new Button("playFromStart");
        btnStart.setOnAction(new EventHandler<ActionEvent>() {

            @Override
            public void handle(ActionEvent event) {
                pathTransition.playFromStart();
            }
        });

        root.getChildren().add(btnStart);
        root.getChildren().add(imageView);
        root.getChildren().add(path);
        primaryStage.setScene(scene);
        primaryStage.show();

    }
}
Draw line along Path

/*
* To change this template, choose Tools | Templates
* and open the template in the editor.
*/
package javafx_path;

import javafx.application.Application;
import javafx.scene.Group;
import javafx.scene.Scene;
import javafx.scene.paint.Color;
import javafx.scene.shape.LineTo;
import javafx.scene.shape.MoveTo;
import javafx.scene.shape.Path;
import javafx.stage.Stage;

/**
*
* @web java-buddy.blogspot.com
*/
public class JavaFX_Path extends Application {

  /**
   * @param args the command line arguments
   */
  public static void main(String[] args) {
      launch(args);
  }

  @Override
  public void start(Stage primaryStage) {
      primaryStage.setTitle("java-buddy.blogspot.com");
      Group root = new Group();
      Scene scene = new Scene(root, 400, 300, Color.WHITE);

      Path path = new Path();
      path.getElements().add(new MoveTo(50, 50));
      path.getElements().add(new LineTo(50, 200));
      path.getElements().add(new LineTo(100, 200));
      path.getElements().add(new LineTo(100, 100));
      path.getElements().add(new LineTo(200, 100));
      path.setStrokeWidth(1);
      path.setStroke(Color.BLACK);

      root.getChildren().add(path);
      primaryStage.setScene(scene);
      primaryStage.show();

  }
}
Saturday, March 3, 2012
Java 7 Recipes: A Problem-Solution Approach
Java 7 Recipes offers solutions to common programming problems encountered every day while developing Java-based applications. Fully updated with the newest features and techniques available, Java 7 Recipes provides code examples involving Servlets, Java FX 2.0, XML, Java Swing, and much more. Content is presented in the popular problem-solution format: Look up the programming problem that you want to solve. Read the solution. Apply the solution directly in your own code. Problem solved!
The problem-solution approach sets Java 7 Recipes apart from other books on the topic. Java 7 Recipes is focused less on the language itself and more on what you can do with it that is useful. The book respects your time by always focusing on a task that you might want to perform using the language. Solutions come first. Explanations come later. You are free to crib from the book and apply the code examples directly to your own projects.
- Covers all-new release of Java: Java 7
- Focuses especially on up-and-coming technologies such as Java FX 2.0
- Respects your time by focusing on practical solutions you can implement in your own code
What you’ll learn
- Develop Java SE applications using the latest in Java SE technology
- Create great-looking user interfaces with Java Swing and Java FX 2.0
- Build web-based applications around Java Servlet technology
- Generate graphics and work with media such as sound and video
- Implement web services and applications to invoke them
- Exploit the power of XML from within your Java applications
Who this book is for
This book is for experienced Java programmers new to Java 7 and those with some experience with Java 7.
Table of Contents
- Getting Started with Java 7
- Strings
- Numbers and Dates
- Data Structures, Conditionals, and Iteration
- Input and Output
- Exceptions, Logging, and Debugging
- Object Oriented Java
- Concurrency
- Debugging and Unit Testing
- Unicode, Internationalization, and Currency Codes
- Working with Databases (JDBC)
- Java 2D Graphics and Media
- Java 3D
- Swing API
- JavaFX Fundamentals
- Graphics with JavaFX
- Media with JavaFX
- Working with Servlets
- Applets
- JavaFX on the Web
- XML and Web Services
- Networking
About the Author
Josh Juneau has been developing software since the mid-1990s. PL/SQL development and database programming was the focus of his career in the beginning, but as his skills developed, he began to use Java and later shifted to it as a primary base for his application development. Josh has worked with Java in the form of graphical user interface, web, and command-line programming for several years. During his tenure as a Java developer, he has worked with many frameworks such as JSF, EJB, and JBoss Seam. At the same time, Josh has extended his knowledge of the Java Virtual Machine (JVM) by learning and developing applications with other JVM languages such as Jython and Groovy. His interest in learning new languages that run on the JVM led to his interest in Jython. Since 2006, Josh has been the editor and publisher for the Jython Monthly newsletter. In late 2008, he began a podcast dedicated to the Jython programming language.
Carl P. Dea is a software engineer working for BCT LLC on projects with high performance computing (HPC) architectures. He has been developing software for 15 years with many clients, from Fortune 500 companies to nonprofit organizations. He has written software ranging from mission-critical applications to Web applications. Carl has been using Java since the very beginning and is a JavaFX enthusiast dating back to when JavaFX used to be called F3. He has been involved with open-source projects such as JFXtras and JDIC.
Carl’s passion for software development started when his middle school science teacher showed him the TRS-80 computer. His current software development interests are: rich client platforms (RCP), rich Internet applications (RIAs), Groovy, game programming, Arduino, mobile phones, and tablet computers. When he's not working, Carl and his wife love to watch their daughters perform at gymnastics meets. Carl lives on the East Coast in Pasadena (aka "The Dena"), Maryland. You can follow him on Twitter @carldea, and on LinkedIn at www.linkedin.com/in/carldea. Carl also blogs at carlfx.wordpress.com.
Freddy Guime is the Director of Client Technology at OptionsCity Software, Inc. in Downtown Chicago. As one of the first employees, Freddy has advanced the Options Trading Client platform by pushing Java Swing to its limits. With two JavaOne presentations under his belt, he has been instrumental in making sure OptionsCity software can keep up with more than five thousand exchange messages per-second in real-time. Also a usability guru, Freddy understands and bridges the concepts of high-throughput with usability within OptionsCity's software. Freddy is currently working in many projects, but occasionally posts within the OptionsCity blog: http://www.optionscity.com/blog.
John O'Conner is a husband, father, and sleep-deprived technology enthusiast. Currently the Globalization Architect at Adobe Systems, John utilizes a variety of technologies, strategies, and best practices to ensure that Adobe's Creative Media and Marketing products meet the demands of a global customer base. He began his Java career at Sun Microsystems in 1997 and helped develop the internationalization and Unicode support libraries of the core Java SE platform. The common thread running through his career is his interest in creating globalized, world-ready software platforms. He frequently writes about Java and internationalization topics on his blog at joconner.com. You can also follow him on Twitter as @jsoconner.
Subscribe to:
Posts (Atom)