Wednesday, February 27, 2013

Create dynamic StackedBarChart of JavaFX 2

***update@2013-03-02- It's not a good example! Please read the improved version "JavaFX 2: Update StackedBarChart dynamically, with TableView".

The example "JavaFX 2.1: javafx.scene.chart.StackedBarChart" demonstrate how to create StackedBarChart with preset data. In this example, we will modify the content in the XYChart.Series, via a TableView. The StackedBarChart will update accordingly in runtime.


package javafx_tableview;

import java.util.Arrays;
import javafx.application.Application;
import javafx.collections.FXCollections;
import javafx.collections.ObservableList;
import javafx.event.EventHandler;
import javafx.scene.Group;
import javafx.scene.Scene;
import javafx.scene.chart.*;
import javafx.scene.control.*;
import javafx.scene.control.cell.PropertyValueFactory;
import javafx.scene.input.KeyCode;
import javafx.scene.input.KeyEvent;
import javafx.scene.layout.HBox;
import javafx.stage.Stage;
import javafx.util.Callback;

/**
*
* @web http://java-buddy.blogspot.com/
*/
public class JavaFX_TableView extends Application {
    
    private TableView<XYChart.Data> tableView = new TableView<>();
    
    private ObservableList<XYChart.Data> dataList =
            FXCollections.observableArrayList(
                new XYChart.Data("January", 100),
                new XYChart.Data("February", 200),
                new XYChart.Data("March", 50),
                new XYChart.Data("April", 75),
                new XYChart.Data("May", 110),
                new XYChart.Data("June", 300),
                new XYChart.Data("July", 111),
                new XYChart.Data("August", 30),
                new XYChart.Data("September", 75),
                new XYChart.Data("October", 55),
                new XYChart.Data("November", 225),
                new XYChart.Data("December", 99));
    
    /**
    * @param args the command line arguments
    */
    public static void main(String[] args) {
        launch(args);
    }
    
    @Override
    public void start(Stage primaryStage) {
        primaryStage.setTitle("java-buddy.blogspot.com");
        Group root = new Group();
        
        tableView.setEditable(true);
        Callback<TableColumn, TableCell> cellFactory =
            new Callback<TableColumn, TableCell>() {
                @Override
                public TableCell call(TableColumn p) {
                    return new EditingCell();
                }
            };
        
        TableColumn columnMonth = new TableColumn("Month");
        columnMonth.setCellValueFactory(
            new PropertyValueFactory<XYChart.Data,String>("XValue"));
        
        TableColumn columnValue = new TableColumn("Value");
        columnValue.setCellValueFactory(
            new PropertyValueFactory<XYChart.Data,Number>("YValue"));
        
        //--- Add for Editable Cell of Value field, in Number
        columnValue.setCellFactory(cellFactory);
        
        columnValue.setOnEditCommit(
            new EventHandler<TableColumn.CellEditEvent<XYChart.Data, Number>>() {
                
                @Override public void handle(TableColumn.CellEditEvent<XYChart.Data, Number> t) {
                    ((XYChart.Data)t.getTableView().getItems().get(
                            t.getTablePosition().getRow())).setYValue(t.getNewValue());
                }
            });
        
        //--- Prepare StackedBarChart
        final CategoryAxis xAxis = new CategoryAxis();
        final NumberAxis yAxis = new NumberAxis();
        xAxis.setLabel("Month");
        xAxis.setCategories(FXCollections.<String> observableArrayList(Arrays.asList(
                "January", 
                "February",
                "March",
                "April",
                "May",
                "June",
                "July",
                "August",
                "September",
                "October",
                "November",
                "December")));
        yAxis.setLabel("Value");
        final StackedBarChart<String,Number> stackedBarChart = new StackedBarChart<>(xAxis,yAxis);
        stackedBarChart.setTitle("StackedBarChart");
        XYChart.Series series1 = new XYChart.Series(dataList);
        series1.setName("XYChart.Series 1");
        
        //Series 2
        XYChart.Series<String,Number> series2 = new XYChart.Series();
        series2.setName("XYChart.Series 2");
           
        series2.getData().add(new XYChart.Data("January", 150));
        series2.getData().add(new XYChart.Data("February", 100));
        series2.getData().add(new XYChart.Data("March", 60));
        series2.getData().add(new XYChart.Data("April", 40));
        series2.getData().add(new XYChart.Data("May", 30));
        series2.getData().add(new XYChart.Data("June", 100));
        series2.getData().add(new XYChart.Data("July", 100));
        series2.getData().add(new XYChart.Data("August", 10));
        series2.getData().add(new XYChart.Data("September", 175));
        series2.getData().add(new XYChart.Data("October", 155));
        series2.getData().add(new XYChart.Data("November", 125));
        series2.getData().add(new XYChart.Data("December", 150));
        
        stackedBarChart.getData().addAll(series1, series2);
        
        //--- Prepare TableView
        tableView.setItems(dataList);
        tableView.getColumns().addAll(columnMonth, columnValue);
        
        HBox hBox = new HBox();
        hBox.setSpacing(10);
        hBox.getChildren().addAll(tableView, stackedBarChart);
        
        root.getChildren().add(hBox);
        
        primaryStage.setScene(new Scene(root, 750, 400));
        primaryStage.show();
    }
    
    class EditingCell extends TableCell<XYChart.Data, Number> {
        
        private TextField textField;
        
        public EditingCell() {}
        
        @Override
        public void startEdit() {
            
            super.startEdit();
            
            if (textField == null) {
                createTextField();
            }
            
            setGraphic(textField);
            setContentDisplay(ContentDisplay.GRAPHIC_ONLY);
            textField.selectAll();
        }
        
        @Override
        public void cancelEdit() {
            super.cancelEdit();
            
            setText(String.valueOf(getItem()));
            setContentDisplay(ContentDisplay.TEXT_ONLY);
        }
        
        @Override
        public void updateItem(Number item, boolean empty) {
            super.updateItem(item, empty);
            
            if (empty) {
                setText(null);
                setGraphic(null);
            } else {
                if (isEditing()) {
                    if (textField != null) {
                        textField.setText(getString());
                    }
                    setGraphic(textField);
                    setContentDisplay(ContentDisplay.GRAPHIC_ONLY);
                } else {
                    setText(getString());
                    setContentDisplay(ContentDisplay.TEXT_ONLY);
                }
            }
        }
        
        private void createTextField() {
            textField = new TextField(getString());
            textField.setMinWidth(this.getWidth() - this.getGraphicTextGap()*2);
            textField.setOnKeyPressed(new EventHandler<KeyEvent>() {
                
                @Override
                public void handle(KeyEvent t) {
                    if (t.getCode() == KeyCode.ENTER) {
                        commitEdit(Double.parseDouble(textField.getText()));
                    } else if (t.getCode() == KeyCode.ESCAPE) {
                        cancelEdit();
                    }
                }
            });
        }
        
        private String getString() {
            return getItem() == null ? "" : getItem().toString();
        }
    }
}


Compare with: Create and update LineChart from TableView

Monday, February 25, 2013

Load True Type Font (ttf) in JavaFX

To load True Type Font (ttf) in JavaFX, create a folder fonts under your Source Packages, copy your ttf file into it. Load the font with Font.loadFont() method.

Save ttf file in /fonts folder.


package javafxttf;

import javafx.application.Application;
import javafx.event.ActionEvent;
import javafx.event.EventHandler;
import javafx.scene.Scene;
import javafx.scene.control.Button;
import javafx.scene.layout.StackPane;
import javafx.scene.text.Font;
import javafx.stage.Stage;

/**
 *
 * @web http://java-buddy.blogspot.com/
 */
public class JavaFXTTF extends Application {
    
    @Override
    public void start(Stage primaryStage) {
        
        Font myFontloadFontAirstreamNF20 = 
            Font.loadFont(getClass()
                .getResourceAsStream("/fonts/AirstreamNF.ttf"), 20);

        Button btn = new Button();
        btn.setFont(myFontloadFontAirstreamNF20);
        btn.setText("Say 'Hello World'");
        btn.setOnAction(new EventHandler<ActionEvent>() {
            @Override
            public void handle(ActionEvent event) {
                System.out.println("Hello World!");
            }
        });
        
        StackPane root = new StackPane();
        root.getChildren().add(btn);
        
        Scene scene = new Scene(root, 300, 250);
        
        primaryStage.setTitle("Hello World!");
        primaryStage.setScene(scene);
        primaryStage.show();
    }

    public static void main(String[] args) {
        launch(args);
    }
}


Load True Type Font (ttf) in JavaFX


Related article: Apply system installed fonts.

Example to apply font

This example demonstrate how to apply the selected font family on Label. Also demonstrate how to use JavaFX SplitPane.

Example to apply font


package javafxfonts;

import java.util.List;
import javafx.application.Application;
import javafx.collections.FXCollections;
import javafx.collections.ObservableList;
import javafx.event.EventHandler;
import javafx.scene.Scene;
import javafx.scene.control.Label;
import javafx.scene.control.ListView;
import javafx.scene.control.SplitPane;
import javafx.scene.input.MouseEvent;
import javafx.scene.layout.StackPane;
import javafx.scene.text.Font;
import javafx.stage.Stage;

/**
 *
 * @web http://java-buddy.blogspot.com/
 */
public class JavaFXFonts extends Application {
    
    @Override
    public void start(Stage primaryStage) {
        primaryStage.setTitle("http://java-buddy.blogspot.com/");
        
        StackPane sp2 = new StackPane();
        final Label label = new Label();
        sp2.getChildren().add(label);
        
        final ListView<String> listView = new ListView<>();
        List<String> familiesList = Font.getFamilies();
        ObservableList<String> familiesObservableList = 
                FXCollections.observableArrayList(familiesList);
        listView.setItems(familiesObservableList);
        
        listView.setOnMouseClicked(new EventHandler<MouseEvent>(){

            @Override
            public void handle(MouseEvent t) {
                String selectedFamily = 
                        listView.getSelectionModel().getSelectedItem();
                
                //Apply the selected font family
                Font selectedFont = Font.font(selectedFamily, 20.0);
                label.setText(selectedFamily);
                label.setFont(selectedFont);
            }
        });
        
        SplitPane splitPane = new SplitPane();
        StackPane sp1 = new StackPane();
        sp1.getChildren().add(listView);
        
        splitPane.getItems().addAll(sp1, sp2);        
        
        primaryStage.setScene(new Scene(splitPane, 300, 250));
        primaryStage.show();
    
    }

    public static void main(String[] args) {
        launch(args);
    }
}


Related article: Load True Type Font (ttf) in JavaFX

Get installed font families using Font.getFamilies()

Get installed font families using Font.getFamilies()


package javafxfonts;

import java.util.List;
import javafx.application.Application;
import javafx.collections.FXCollections;
import javafx.collections.ObservableList;
import javafx.scene.Scene;
import javafx.scene.control.ListView;
import javafx.scene.layout.StackPane;
import javafx.scene.text.Font;
import javafx.stage.Stage;

/**
 *
 * @web http://java-buddy.blogspot.com/
 */
public class JavaFXFonts extends Application {
    
    @Override
    public void start(Stage primaryStage) {
        primaryStage.setTitle("http://java-buddy.blogspot.com/");
        
        ListView<String> listView = new ListView<>();
        List<String> familiesList = Font.getFamilies();
        ObservableList<String> familiesObservableList = 
                FXCollections.observableArrayList(familiesList);
        listView.setItems(familiesObservableList);
        
        StackPane root = new StackPane();
        root.getChildren().add(listView);
        primaryStage.setScene(new Scene(root, 300, 250));
        primaryStage.show();
    
    }

    public static void main(String[] args) {
        launch(args);
    }
}


more: Example to apply font.

Thursday, February 21, 2013

List system environment using System.getenv()

package javaapplication1;

import java.util.Iterator;
import java.util.Map;

public class JavaApplication1 {

    public static void main(String[] args) {
        
        Map<String, String> envMap = System.getenv();
        
        Iterator<String> iterator = envMap.keySet().iterator();
        while (iterator.hasNext()) {
            String iteratorKey = iterator.next();
            System.out.println(iteratorKey + " : " + envMap.get(iteratorKey));
        }
    }
}


List system environment

Read installed java version

To get system property of installed java version, call System.getProperty("java.version").

Example:

package javaapplication1;

public class JavaApplication1 {

    public static void main(String[] args) {
        String javaVersion = System.getProperty("java.version");
        System.out.println("java.version: " + javaVersion);
    }
}


Read installed java version


NetBeans IDE 7.3 released

NetBeans IDE 7.3 released with support for HTML5 applications and includes significant improvements for editing JavaScript, CSS and HTML files.

NetBeans IDE 7.3 Overview


Wednesday, February 20, 2013

JTabbedPane with icon

Tabbed panel with icon


package javajframeapplication;

import java.awt.BorderLayout;
import java.awt.GridLayout;
import java.awt.event.ActionEvent;
import java.awt.event.ActionListener;
import java.net.URL;
import javax.swing.ImageIcon;
import javax.swing.JButton;
import javax.swing.JFrame;
import javax.swing.JLabel;
import javax.swing.JPanel;
import javax.swing.JTabbedPane;
import javax.swing.SwingUtilities;

/**
 *
 * @web http://java-buddy.blogspot.com/
 */
public class JavaJFrameApplication {
    
    static public class MyTabJPanel extends JPanel {
        
        public MyTabJPanel(){
            super(new GridLayout(1, 1));
            
            JTabbedPane jTabbedPane = new JTabbedPane();
            
            JPanel jPaneA = new JPanel();
            JLabel jLabelA = new JLabel("It's Tab A");
            jPaneA.add(jLabelA);
            URL imageUrl = JavaJFrameApplication.class.getResource("duke_20x36.png");
            ImageIcon imageIconA = new ImageIcon(imageUrl);
            
            JPanel jPaneB = new JPanel();
            JButton jButton = new JButton("Button in Tab B");
            jPaneB.add(jButton);
            
            JPanel jPaneC = new JPanel();
            JButton buttonExit = new JButton("Exit button on Tab C");
            buttonExit.addActionListener(new ActionListener(){

                @Override
                public void actionPerformed(ActionEvent e) {
                    System.exit(0);
                }

            });
            jPaneC.add(buttonExit);
            
            jTabbedPane.addTab("Tab A", imageIconA, jPaneA);
            jTabbedPane.addTab("Tab B", jPaneB);
            jTabbedPane.addTab("Tab C", jPaneC);
            
            add(jTabbedPane);
        }
        
    }
    
    public static void main(String[] args) {
        
        SwingUtilities.invokeLater(new Runnable(){

            @Override
            public void run() {
                JFrame mainJFrame = new JFrame();
                mainJFrame.setDefaultCloseOperation(JFrame.EXIT_ON_CLOSE);
                mainJFrame.setTitle("java-buddy.blogspot.com");
                mainJFrame.setSize(400, 300);

                MyTabJPanel myTabJPanel = new MyTabJPanel();
                mainJFrame.add(myTabJPanel, BorderLayout.CENTER);
                mainJFrame.setVisible(true);
            }
        });
    }
}


Implement tabbed panel using JTabbedPane

Example to implement tabbed panel using JTabbedPane.

JTabbedPane
JTabbedPane


package javajframeapplication;

import java.awt.BorderLayout;
import java.awt.GridLayout;
import java.awt.event.ActionEvent;
import java.awt.event.ActionListener;
import javax.swing.JButton;
import javax.swing.JFrame;
import javax.swing.JLabel;
import javax.swing.JPanel;
import javax.swing.JTabbedPane;
import javax.swing.SwingUtilities;

/**
 *
 * @web http://java-buddy.blogspot.com/
 */
public class JavaJFrameApplication {
    
    static public class MyTabJPanel extends JPanel {
        
        public MyTabJPanel(){
            super(new GridLayout(1, 1));
            
            JTabbedPane jTabbedPane = new JTabbedPane();
            
            JPanel jPaneA = new JPanel();
            JLabel jLabelA = new JLabel("It's Tab A");
            jPaneA.add(jLabelA);
            
            JPanel jPaneB = new JPanel();
            JButton jButton = new JButton("Button in Tab B");
            jPaneB.add(jButton);
            
            JPanel jPaneC = new JPanel();
            JButton buttonExit = new JButton("Exit button on Tab C");
            buttonExit.addActionListener(new ActionListener(){

                @Override
                public void actionPerformed(ActionEvent e) {
                    System.exit(0);
                }

            });
            jPaneC.add(buttonExit);
            
            jTabbedPane.addTab("Tab A", jPaneA);
            jTabbedPane.addTab("Tab B", jPaneB);
            jTabbedPane.addTab("Tab C", jPaneC);
            
            add(jTabbedPane);
        }
        
    }
    
    public static void main(String[] args) {
        
        SwingUtilities.invokeLater(new Runnable(){

            @Override
            public void run() {
                JFrame mainJFrame = new JFrame();
                mainJFrame.setDefaultCloseOperation(JFrame.EXIT_ON_CLOSE);
                mainJFrame.setTitle("java-buddy.blogspot.com");
                mainJFrame.setSize(400, 300);

                MyTabJPanel myTabJPanel = new MyTabJPanel();
                mainJFrame.add(myTabJPanel, BorderLayout.CENTER);
                mainJFrame.setVisible(true);
            }
        });
    }
}


Monday, February 18, 2013

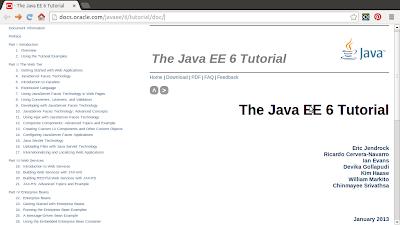
Last Java EE 6 Tutorial Update

Last Official Java EE 6 Tutorial updated. This update (version 6.0.8) is the last releases for Java EE 6 since the team will now be focusing full time on Java EE 7.

Official Java EE 6 Tutorial


http://docs.oracle.com/javaee/6/tutorial/doc

JavaOne 2012 Videos Now on YouTube


The JavaOne San Francisco 2012 videos are now on YouTube via the Oracle Learning Portal (OLP). The videos are 100% free for anyone to view.
The videos are organized by the JavaOne 2012 Technical Tracks on the following links:

Source: https://blogs.oracle.com/theaquarium/entry/javaone_2012_videos_now_on

Tuesday, February 12, 2013

Obtain API Key for Google Maps API v3

All Maps API applications* should load the Maps API using an API key ~ https://developers.google.com/maps/documentation/javascript/tutorial.

The steps are shown here:

- Visit Google APIs Console (you have to login with your Google account).


- Create a new API Project.


- Enter the name to your project.


- Enable the Google Maps API V3.


- Accept these terms.


- Make sure to select the Project in the left, and select API Access, you can copy the API Key to your application.


Related article:
- Embed Google Maps API v3 in JavaFX WebView.

Embed Google Maps API v3 in JavaFX WebView

Embed Google Maps API v3 in JavaFX WebView

Note:
  • In order to use Google Maps API v3 in your application, you have to obtain API Key. Read here: Obtain API Key for Google Maps API v3.
  • In the current version, it seem that there are problem in mouse gesture action on Map; you cannot plan on the may.

package javafxgooglemaps;

import java.net.URL;
import javafx.application.Application;
import javafx.scene.Scene;
import javafx.scene.layout.HBox;
import javafx.scene.layout.Region;
import javafx.scene.web.WebEngine;
import javafx.scene.web.WebView;
import javafx.stage.Stage;

/**
 *
 * @web http://java-buddy.blogspot.com/
 */
public class JavaFXGoogleMaps extends Application {
    
    private Scene scene;
    MyBrowser myBrowser;
    
    @Override
    public void start(Stage primaryStage) {
        primaryStage.setTitle("java-buddy.blogspot.com");
        primaryStage.setWidth(400);
        primaryStage.setHeight(300);
        myBrowser = new MyBrowser();
        scene = new Scene(myBrowser, 400, 300);
        primaryStage.setScene(scene);
        primaryStage.show();
    }

    public static void main(String[] args) {
        launch(args);
    }
    
    class MyBrowser extends Region {
        HBox toolbar;
        
        WebView webView = new WebView();
        WebEngine webEngine = webView.getEngine();
        
        
        public MyBrowser(){
         
            final URL urlGoogleMaps = getClass().getResource("GoogleMapsV3.html");
            webEngine.load(urlGoogleMaps.toExternalForm());
            webEngine.setJavaScriptEnabled(true);
            
            getChildren().add(webView);
         
      }
    }
}


Create a html file, GoogleMapsV3.html.
<!DOCTYPE html>
<html>
  <head>
    <meta name="viewport" content="initial-scale=1.0, user-scalable=no" />
    <style type="text/css">
      html { height: 100% }
      body { height: 100%; margin: 0; padding: 0 }
      #map_canvas { height: 100% }
    </style>
    <script type="text/javascript"
      src="https://maps.googleapis.com/maps/api/js?key=< your API Key >&sensor=false">
    </script>
    <script type="text/javascript">
      function initialize() {
        var mapOptions = {
          center: new google.maps.LatLng(-34.397, 150.644),
          zoom: 8,
          mapTypeId: google.maps.MapTypeId.ROADMAP
        };
        var map = new google.maps.Map(document.getElementById("map_canvas"),
            mapOptions);
      }
    </script>
  </head>
  <body onload="initialize()">
    <div id="map_canvas" style="width:400px; height:300px"></div>
  </body>
</html>


Sunday, February 10, 2013

Create GUI application, by instantiating non-static inner class of JFrame.

Last article demonstrate "Create GUI application, by instantiating static inner class of JFrame". If the inner class is declared as non-static, it cannot be accessed directly in main(). You can instantiate the outer class in main(), and then instantiate the inner class in constructor.

package javajframeapplication;

import java.awt.event.ActionEvent;
import java.awt.event.ActionListener;
import javax.swing.JButton;
import javax.swing.JFrame;
import javax.swing.SwingUtilities;

/**
 *
 * @web http://java-buddy.blogspot.com/
 */
public class JavaJFrameApplication {
    
    private class InnerJFrame extends JFrame{
    
        public InnerJFrame(){
            this.setTitle("non-static inner JFrame");
            this.setSize(300, 200);
            this.setDefaultCloseOperation(JFrame.EXIT_ON_CLOSE);
            
            JButton buttonExit = new JButton("Exit");
            buttonExit.addActionListener(new ActionListener(){
                @Override
                public void actionPerformed(ActionEvent e) {
                    System.exit(0);
                }
            });
            
            this.add(buttonExit);
        }
    
    }
    
    JavaJFrameApplication(){
        InnerJFrame myInnerJFrame = new InnerJFrame();
        myInnerJFrame.setVisible(true);
    }
    
    public static void main(String[] args) {
        
        SwingUtilities.invokeLater(new Runnable(){

            @Override
            public void run() {
                
                JavaJFrameApplication myJavaJFrameApplication =
                        new JavaJFrameApplication();
            }
        });
    }
}


GUI application, by instantiating non-static inner class of JFrame.


Create GUI application, by instantiating static inner class of JFrame.

Last article demonstrate how to "Create GUI application, by instantiating outer class of JFrame". Alternatively, we can code the extended JFrame as inner class, named InnerJFrame.


package javajframeapplication;

import java.awt.event.ActionEvent;
import java.awt.event.ActionListener;
import javax.swing.JButton;
import javax.swing.JFrame;
import javax.swing.SwingUtilities;

/**
 *
 * @web http://java-buddy.blogspot.com/
 */
public class JavaJFrameApplication {
    
    static private class InnerJFrame extends JFrame{
    
        public InnerJFrame(){
            this.setTitle("static inner JFrame");
            this.setSize(300, 200);
            this.setDefaultCloseOperation(JFrame.EXIT_ON_CLOSE);
            
            JButton buttonExit = new JButton("Exit");
            buttonExit.addActionListener(new ActionListener(){
                @Override
                public void actionPerformed(ActionEvent e) {
                    System.exit(0);
                }
            });
            
            this.add(buttonExit);
        }
    
    }
    
    public static void main(String[] args) {
        
        SwingUtilities.invokeLater(new Runnable(){

            @Override
            public void run() {
                
                InnerJFrame myInnerJFrame = new InnerJFrame();
                myInnerJFrame.setVisible(true);
            }
        });
    }
}


Please notice that InnerJFrame have to be declared static in this implementation, otherwise error of "non-static variable this cannot be referenced from a static context" will be complained. It's because instance of non-static inner class(InnerJFrame) can exist only within an instance of outer class(JavaJFrameApplication). At the time of main() run, object of JavaJFrameApplication have not been instantiated.

If you prefer declare the inner class as non-static, read the article "Create GUI application, by instantiating non-static inner class of JFrame".

Create GUI application, by instantiating outer class of JFrame.

This example demonstrate how to create GUI for Java Application, by instantiating outer class of JFrame.

GUI for Java Application

Create a class OuterJFrame.java, extends JFrame.
package javajframeapplication;

import java.awt.event.ActionEvent;
import java.awt.event.ActionListener;
import javax.swing.JButton;
import javax.swing.JFrame;

public class OuterJFrame extends JFrame{
    
    public OuterJFrame(){
            this.setTitle("Java-Buddy");
            this.setSize(300, 200);
            this.setDefaultCloseOperation(JFrame.EXIT_ON_CLOSE);
            
            JButton buttonExit = new JButton("Exit");
            buttonExit.addActionListener(new ActionListener(){
                @Override
                public void actionPerformed(ActionEvent e) {
                    System.exit(0);
                }
            });
            
            this.add(buttonExit);
    }
}


Modify main class, instantiate OuterJFrame class in main() method.
package javajframeapplication;

import javax.swing.SwingUtilities;

/**
 *
 * @web http://java-buddy.blogspot.com/
 */
public class JavaJFrameApplication {
    
    public static void main(String[] args) {
        
        SwingUtilities.invokeLater(new Runnable(){

            @Override
            public void run() {
                
                OuterJFrame myOuterJFrame = new OuterJFrame();
                myOuterJFrame.setVisible(true);
            }
        });
    }
}


We can also implement our custom JFrame as inner class. Refer:


Thursday, February 7, 2013

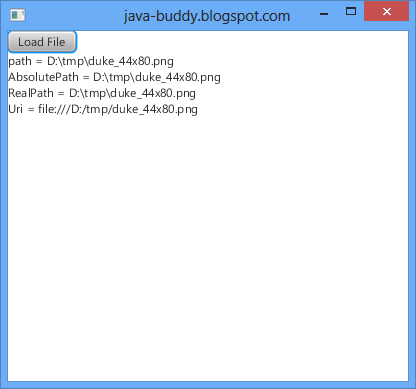
AbsolutePath, RealPath and Uri

AbsolutePath, RealPath and Uri


package javafx_niofile;

import java.io.File;
import java.io.IOException;
import java.nio.file.LinkOption;
import java.nio.file.Path;
import java.util.logging.Level;
import java.util.logging.Logger;
import javafx.application.Application;
import javafx.event.ActionEvent;
import javafx.event.EventHandler;
import javafx.scene.Scene;
import javafx.scene.control.Button;
import javafx.scene.control.Label;
import javafx.scene.layout.VBox;
import javafx.stage.FileChooser;
import javafx.stage.Stage;

/**
 *
 * @web http://java-buddy.blogspot.com/
 */
public class JavaFX_NIOFile extends Application {
    
    Label label;
    
    @Override
    public void start(Stage primaryStage) {
        Button btnLoad = new Button();
        btnLoad.setText("Load File");
        btnLoad.setOnAction(btnLoadEventListener);
        
        label = new Label();
        
        VBox rootBox = new VBox();
        rootBox.getChildren().addAll(btnLoad, label);
        
        Scene scene = new Scene(rootBox, 400, 350);
        primaryStage.setTitle("java-buddy.blogspot.com");
        primaryStage.setScene(scene);
        primaryStage.show();
    }

    public static void main(String[] args) {
        launch(args);
    }
    
    EventHandler<ActionEvent> btnLoadEventListener
    = new EventHandler<ActionEvent>(){
  
        @Override
        public void handle(ActionEvent t) {
            FileChooser fileChooser = new FileChooser();
              
            //Set extension filter
            FileChooser.ExtensionFilter extFilter 
                    = new FileChooser.ExtensionFilter("ALL files (*.*)", "*.*");
            fileChooser.getExtensionFilters().add(extFilter);
               
            //Show open file dialog, return a java.io.File object
            File file = fileChooser.showOpenDialog(null);
            
            //obtain a java.nio.file.Path object 
            Path path = file.toPath();
            
            String fileInfo;
            fileInfo = "path = " + path + "\n";
            try {
                fileInfo +=
                 "AbsolutePath = " + path.toAbsolutePath() + "\n" +
                 "RealPath = " + path.toRealPath(LinkOption.NOFOLLOW_LINKS) + "\n" +
                 "Uri = " + path.toUri() + "\n";
            } catch (IOException ex) {
                Logger.getLogger(JavaFX_NIOFile.class.getName()).log(Level.SEVERE, null, ex);
            }

            label.setText(fileInfo);
        }
    };
}


NetBeans IDE 7.3 RC2 Released

NetBeans IDE 7.3 RC2 Released.

What's New in 7.3 RC2


  • Rich Web applications (HTML5, JavaScript, CSS)
  • Extended clipboard and refactoring improvements in Java Editor
  • JavaTM SE Development Kit 7 Update 10 support
  • Full support of JavaFX 2.2.4 SDK
  • Support for JavaME SDK 3.2
  • Additional enhancements are listed on the NetBeans IDE 7.3 New and Noteworthy page.
For more about this release, see the NetBeans IDE 7.3 RC2 Release Information page.

Wednesday, February 6, 2013

Resolve path

This example demonstrate how to use the method Path java.nio.file.Path.resolve(Path other) to resolve the given path against this path.

package javafx_niofile;

import java.io.File;
import java.nio.file.Path;
import javafx.application.Application;
import javafx.event.ActionEvent;
import javafx.event.EventHandler;
import javafx.scene.Scene;
import javafx.scene.control.Button;
import javafx.scene.control.Label;
import javafx.scene.layout.VBox;
import javafx.stage.FileChooser;
import javafx.stage.Stage;

/**
 *
 * @web http://java-buddy.blogspot.com/
 */
public class JavaFX_NIOFile extends Application {
    
    Label label;
    
    @Override
    public void start(Stage primaryStage) {
        Button btnLoad = new Button();
        btnLoad.setText("Load File");
        btnLoad.setOnAction(btnLoadEventListener);
        
        label = new Label();
        
        VBox rootBox = new VBox();
        rootBox.getChildren().addAll(btnLoad, label);
        
        Scene scene = new Scene(rootBox, 400, 350);
        primaryStage.setTitle("java-buddy.blogspot.com");
        primaryStage.setScene(scene);
        primaryStage.show();
    }

    public static void main(String[] args) {
        launch(args);
    }
    
    EventHandler<ActionEvent> btnLoadEventListener
    = new EventHandler<ActionEvent>(){
  
        @Override
        public void handle(ActionEvent t) {
            FileChooser fileChooser = new FileChooser();
              
            //Set extension filter
            FileChooser.ExtensionFilter extFilter 
                    = new FileChooser.ExtensionFilter("ALL files (*.*)", "*.*");
            fileChooser.getExtensionFilters().add(extFilter);
               
            //Show open file dialog, return a java.io.File object
            File file = fileChooser.showOpenDialog(null);
            
            //obtain a java.nio.file.Path object 
            Path path = file.toPath();
            
            Path parentPath = path.getParent();
            Path partialPath = path.getFileName();
            Path resolvedPath = parentPath.resolve(partialPath);
            
            String fileInfo = "parent = " + parentPath + "\n" +
                    "partial path = " + partialPath + "\n" +
                    "resolve Path = " + resolvedPath;

            label.setText(fileInfo);
        }
    };
}


Resolve path
Resolve path


Monday, February 4, 2013

Implement callback method, using interface.

Example to implement callback method using interface.

Define the interface, NewInterface.java.
package javaapplication1;

public interface NewInterface {
    void callback();
}


Create a new class, NewClass.java. It will call the callback method in main class.
package javaapplication1;

public class NewClass {
    
    private NewInterface mainClass;
    
    public NewClass(NewInterface mClass){
        mainClass = mClass;
    }
    
    public void calledFromMain(){
        //Do somthing...
        
        //call back main
        mainClass.callback();
    }
}


The main class, JavaApplication1.java, to implement the interface NewInterface - callback() method. It will create and call NewClass object. Then, the NewClass object will callback it's callback() method in turn.
package javaapplication1;

/**
 *
 * @web http://java-buddy.blogspot.com/
 */
public class JavaApplication1 implements NewInterface{
    
    NewClass newClass;

    public static void main(String[] args) {
        
        System.out.println("test...");
        
        JavaApplication1 myApplication = new JavaApplication1();
        myApplication.doSomething();

    }
    
    private void doSomething(){
        newClass = new NewClass(this);
        newClass.calledFromMain();
    }

    @Override
    public void callback() {
        System.out.println("callback");
    }

}


Implement callback method, using interface.

Sunday, February 3, 2013

Access subpath of java.nio.file.Path

Access subpath of java.nio.file.Path


package javafx_niofile;

import java.io.File;
import java.nio.file.Path;
import javafx.application.Application;
import javafx.event.ActionEvent;
import javafx.event.EventHandler;
import javafx.scene.Scene;
import javafx.scene.control.Button;
import javafx.scene.control.Label;
import javafx.scene.layout.VBox;
import javafx.stage.FileChooser;
import javafx.stage.Stage;

/**
 *
 * @web http://java-buddy.blogspot.com/
 */
public class JavaFX_NIOFile extends Application {
    
    Label label;
    
    @Override
    public void start(Stage primaryStage) {
        Button btnLoad = new Button();
        btnLoad.setText("Load File");
        btnLoad.setOnAction(btnLoadEventListener);
        
        label = new Label();
        
        VBox rootBox = new VBox();
        rootBox.getChildren().addAll(btnLoad, label);
        
        Scene scene = new Scene(rootBox, 400, 350);
        primaryStage.setTitle("java-buddy.blogspot.com");
        primaryStage.setScene(scene);
        primaryStage.show();
    }

    public static void main(String[] args) {
        launch(args);
    }
    
    EventHandler<ActionEvent> btnLoadEventListener
    = new EventHandler<ActionEvent>(){
  
        @Override
        public void handle(ActionEvent t) {
            FileChooser fileChooser = new FileChooser();
              
            //Set extension filter
            FileChooser.ExtensionFilter extFilter 
                    = new FileChooser.ExtensionFilter("ALL files (*.*)", "*.*");
            fileChooser.getExtensionFilters().add(extFilter);
               
            //Show open file dialog, return a java.io.File object
            File file = fileChooser.showOpenDialog(null);
            
            //obtain a java.nio.file.Path object 
            Path path = file.toPath();

            String fileInfo = "path = " + path + "\n";
            fileInfo += "path.toString() = " + path.toString() + "\n";
            fileInfo += "URI: " + path.toUri() + "\n\n";

            fileInfo += "subPath: \n";
            for (Path subPath : path) {
                fileInfo += subPath + "\n";
            }

            label.setText(fileInfo);
        }
    };
}


Related:
- Get file info using java.nio.file.Path and java.nio.file.Files

Friday, February 1, 2013

How to remove JDK in Ubuntu Linux

Java SE 7 Update 13 released, so I have to remove old jdk and install the updated version.

To remove jdk using update-alternatives, open Terminal and type the commands:

sudo update-alternatives --remove "javac" "/home/you/jdk1.7.0_11/bin/javac"
sudo update-alternatives --remove "java" "/home/you/jdk1.7.0_11/bin/java"

remove JDK in Ubuntu Linux

After remove the old jdk, you can remove the old jdk from your hardisk, and re-install the new JDK 7 and update-alternatives.

Java SE 7 Update 13 and Java SE 6 Update 39 released

Java SE 7 Update 13 and Java SE 6 Update 39 released. This release includes important security fixes. Oracle strongly recommends that all Java SE 7 users upgrade to this release, read Release Notes in the download page.


Download: http://www.oracle.com/technetwork/java/javase/downloads/index-jsp-138363.html