Sunday, June 24, 2012

setType(), sets the type of the window.

The method setType(Window.Type type) sets the type of the window. This method can only be called while the window is not displayable.

Where type can be:
  • Type.NORMAL: Represents a normal window. This is the default type for objects of the Window class or its descendants. Use this type for regular top-level windows.
  • Type.POPUP: Represents a popup window. A popup window is a temporary window such as a drop-down menu or a tooltip. On some platforms, windows of that type may be forcibly made undecorated even if they are instances of the Frame or Dialog class, and have decorations enabled.
  • Type.UTILITY: Represents a utility window. A utility window is usually a small window such as a toolbar or a palette. The native system may render the window with smaller title-bar if the window is either a Frame or a Dialog object, and if it has its decorations enabled.

Example:

Example of using setType()


- Create a new Java project of Java application, with main code named JavaTestSwing.java and JFrameWin.java extends javax.swing.JFrame.

package javatestswing;

import java.awt.event.ActionEvent;
import java.awt.event.ActionListener;
import javax.swing.Box;
import javax.swing.ButtonGroup;
import javax.swing.JButton;
import javax.swing.JFrame;
import javax.swing.JPanel;
import javax.swing.JRadioButton;

/**
 *
 * @web http://java-buddy.blogspot.com/
 */
public class JFrameWin extends JFrame{
    
    public JFrameWin(){
        
        final JPanel jPanel = new JPanel();
        
        this.setTitle("java-buddy.blogspot.com");
        this.setSize(500, 400);
        this.setDefaultCloseOperation(JFrame.EXIT_ON_CLOSE);
         
        JButton buttonExit = new JButton(" Exit ");
        buttonExit.addActionListener(new ActionListener(){
 
            @Override
            public void actionPerformed(ActionEvent ae) {
                System.exit(0);
            }
        });
        
        final JRadioButton jRadioButtonA = new JRadioButton("NORMAL");
        final JRadioButton jRadioButtonB = new JRadioButton("POPUP");
        final JRadioButton jRadioButtonC = new JRadioButton("UTILITY");

        ActionListener radioButtonActionListener = new ActionListener() {

            @Override
            public void actionPerformed(ActionEvent ae) {
                
                String cmd = ae.getActionCommand();

                JFrame newFrame =new JFrame();  
                newFrame.setDefaultCloseOperation(JFrame.DISPOSE_ON_CLOSE);
                newFrame.setSize(300,200);
                newFrame.setTitle(cmd);
                
                if(cmd == "NORMAL"){
                    newFrame.setType(Type.NORMAL);
                }else if(cmd == "POPUP"){
                    newFrame.setType(Type.POPUP);
                }else if(cmd == "UTILITY"){
                    newFrame.setType(Type.UTILITY);
                }
                
                newFrame.setVisible(true); 

            }
            
        };
        
        jRadioButtonA.addActionListener(radioButtonActionListener);
        jRadioButtonB.addActionListener(radioButtonActionListener);
        jRadioButtonC.addActionListener(radioButtonActionListener);
        
        ButtonGroup buttonGroup  = new ButtonGroup();
        buttonGroup.add(jRadioButtonA);
        buttonGroup.add(jRadioButtonB);
        buttonGroup.add(jRadioButtonC);
        
        Box verticalBox = Box.createVerticalBox();
        verticalBox.add(jRadioButtonA);
        verticalBox.add(jRadioButtonB);
        verticalBox.add(jRadioButtonC);
        
        jPanel.add(verticalBox);
        jPanel.add(buttonExit);
        
        this.add(jPanel);
        
    }
}


ActionListener of JRadioButton

Example of using JRadioButton ActionListener:

ActionListener of JRadioButton


package javatestswing;

import java.awt.event.ActionEvent;
import java.awt.event.ActionListener;
import javax.swing.Box;
import javax.swing.ButtonGroup;
import javax.swing.JButton;
import javax.swing.JFrame;
import javax.swing.JOptionPane;
import javax.swing.JPanel;
import javax.swing.JRadioButton;

/**
 *
 * @web http://java-buddy.blogspot.com/
 */
public class JFrameWin extends JFrame{
    
    public JFrameWin(){
        
        final JPanel jPanel = new JPanel();
        
        this.setTitle("java-buddy.blogspot.com");
        this.setSize(500, 400);
        this.setDefaultCloseOperation(JFrame.EXIT_ON_CLOSE);
         
        JButton buttonExit = new JButton(" Exit ");
        buttonExit.addActionListener(new ActionListener(){
 
            @Override
            public void actionPerformed(ActionEvent ae) {
                System.exit(0);
            }
        });
        
        final JRadioButton jRadioButtonA = new JRadioButton("JRadioButton A");
        final JRadioButton jRadioButtonB = new JRadioButton("JRadioButton B");
        final JRadioButton jRadioButtonC = new JRadioButton("JRadioButton C");

        ActionListener radioButtonActionListener = new ActionListener() {

            @Override
            public void actionPerformed(ActionEvent ae) {
                JOptionPane.showMessageDialog(
                        JFrameWin.this, ae.getActionCommand());
            }
            
        };
        
        jRadioButtonA.addActionListener(radioButtonActionListener);
        jRadioButtonB.addActionListener(radioButtonActionListener);
        jRadioButtonC.addActionListener(radioButtonActionListener);
        
        ButtonGroup buttonGroup  = new ButtonGroup();
        buttonGroup.add(jRadioButtonA);
        buttonGroup.add(jRadioButtonB);
        buttonGroup.add(jRadioButtonC);
        
        Box verticalBox = Box.createVerticalBox();
        verticalBox.add(jRadioButtonA);
        verticalBox.add(jRadioButtonB);
        verticalBox.add(jRadioButtonC);
        
        jPanel.add(verticalBox);
        jPanel.add(buttonExit);
        
        this.add(jPanel);
        
    }
}


Thursday, June 21, 2012

Java Swing example: place elements in vertical

I want to modify last article "Example of using Swing ButtonGroup" to place the JRadioButton(s) in vertically. It can be done easily with javax.swing.Box.

place elements in vertical


JFrameWin.java
package javatestswing;

import java.awt.event.ActionEvent;
import java.awt.event.ActionListener;
import javax.swing.Box;
import javax.swing.ButtonGroup;
import javax.swing.JButton;
import javax.swing.JFrame;
import javax.swing.JOptionPane;
import javax.swing.JPanel;
import javax.swing.JRadioButton;

/**
 *
 * @web http://java-buddy.blogspot.com/
 */
public class JFrameWin extends JFrame{
    
    public JFrameWin(){
        
        final JPanel jPanel = new JPanel();
        
        this.setTitle("java-buddy.blogspot.com");
        this.setSize(500, 400);
        this.setDefaultCloseOperation(JFrame.EXIT_ON_CLOSE);
         
        JButton buttonExit = new JButton(" Exit ");
        buttonExit.addActionListener(new ActionListener(){
 
            @Override
            public void actionPerformed(ActionEvent ae) {
                System.exit(0);
            }
        });
        
        final JRadioButton jRadioButtonA = new JRadioButton("JRadioButton A");
        final JRadioButton jRadioButtonB = new JRadioButton("JRadioButton B");
        final JRadioButton jRadioButtonC = new JRadioButton("JRadioButton C");
        
        JButton buttonReadRadio = new JButton(" Read Radio Buttons ");
        buttonReadRadio.addActionListener(new ActionListener(){
 
            @Override
            public void actionPerformed(ActionEvent ae) {
                String radioSetting = "";
                
                if (jRadioButtonA.isSelected()){
                    radioSetting += "jRadioButtonA is selected.\n";
                }
                if (jRadioButtonB.isSelected()){
                    radioSetting += "jRadioButtonB is selected.\n";
                }
                if (jRadioButtonC.isSelected()){
                    radioSetting += "jRadioButtonC is selected.\n";
                }
                
                JOptionPane.showMessageDialog(JFrameWin.this, radioSetting);
            }
        });
        
        ButtonGroup buttonGroup  = new ButtonGroup();
        buttonGroup.add(jRadioButtonA);
        buttonGroup.add(jRadioButtonB);
        buttonGroup.add(jRadioButtonC);
        
        Box verticalBox = Box.createVerticalBox();
        verticalBox.add(jRadioButtonA);
        verticalBox.add(jRadioButtonB);
        verticalBox.add(jRadioButtonC);
        
        jPanel.add(verticalBox);
        jPanel.add(buttonReadRadio);
        jPanel.add(buttonExit);
        
        this.add(jPanel);
        
    }
}


Example of using Swing ButtonGroup

With ButtonGroup, only one of the grouped buttons can be selected.

Example of using Swing ButtonGroup

Modify JFrameWin.java from last article "Example of using Swing JRadioButton".

package javatestswing;

import java.awt.event.ActionEvent;
import java.awt.event.ActionListener;
import javax.swing.ButtonGroup;
import javax.swing.JButton;
import javax.swing.JFrame;
import javax.swing.JOptionPane;
import javax.swing.JPanel;
import javax.swing.JRadioButton;

/**
 *
 * @web http://java-buddy.blogspot.com/
 */
public class JFrameWin extends JFrame{
    
    public JFrameWin(){
        
        final JPanel jPanel = new JPanel();
        
        this.setTitle("java-buddy.blogspot.com");
        this.setSize(500, 400);
        this.setDefaultCloseOperation(JFrame.EXIT_ON_CLOSE);
         
        JButton buttonExit = new JButton(" Exit ");
        buttonExit.addActionListener(new ActionListener(){
 
            @Override
            public void actionPerformed(ActionEvent ae) {
                System.exit(0);
            }
        });
        
        final JRadioButton jRadioButtonA = new JRadioButton("JRadioButton A");
        final JRadioButton jRadioButtonB = new JRadioButton("JRadioButton B");
        final JRadioButton jRadioButtonC = new JRadioButton("JRadioButton C");
        
        JButton buttonReadRadio = new JButton(" Read Radio Buttons ");
        buttonReadRadio.addActionListener(new ActionListener(){
 
            @Override
            public void actionPerformed(ActionEvent ae) {
                String radioSetting = "";
                
                if (jRadioButtonA.isSelected()){
                    radioSetting += "jRadioButtonA is selected.\n";
                }
                if (jRadioButtonB.isSelected()){
                    radioSetting += "jRadioButtonB is selected.\n";
                }
                if (jRadioButtonC.isSelected()){
                    radioSetting += "jRadioButtonC is selected.\n";
                }
                
                JOptionPane.showMessageDialog(JFrameWin.this, radioSetting);
            }
        });
        
        ButtonGroup buttonGroup  = new ButtonGroup();
        buttonGroup.add(jRadioButtonA);
        buttonGroup.add(jRadioButtonB);
        buttonGroup.add(jRadioButtonC);
        
        jPanel.add(jRadioButtonA);
        jPanel.add(jRadioButtonB);
        jPanel.add(jRadioButtonC);
        jPanel.add(buttonReadRadio);
        jPanel.add(buttonExit);
        
        this.add(jPanel);
        
    }
}
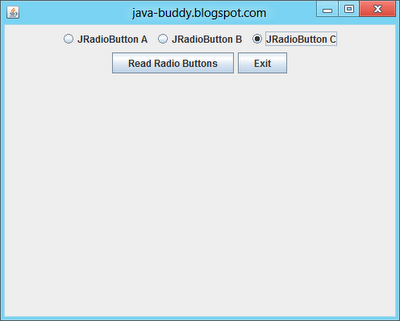


Example of using Swing JRadioButton

Example of using Swing JRadioButton


- Create a new Java project of Java application, with main code named JavaTestSwing.java and JFrameWin.java extends javax.swing.JFrame.

- JFrameWin.java
package javatestswing;

import java.awt.event.ActionEvent;
import java.awt.event.ActionListener;
import javax.swing.JButton;
import javax.swing.JFrame;
import javax.swing.JOptionPane;
import javax.swing.JPanel;
import javax.swing.JRadioButton;

/**
 *
 * @web http://java-buddy.blogspot.com/
 */
public class JFrameWin extends JFrame{
    
    public JFrameWin(){
        
        final JPanel jPanel = new JPanel();
        
        this.setTitle("java-buddy.blogspot.com");
        this.setSize(500, 400);
        this.setDefaultCloseOperation(JFrame.EXIT_ON_CLOSE);
         
        JButton buttonExit = new JButton(" Exit ");
        buttonExit.addActionListener(new ActionListener(){
 
            @Override
            public void actionPerformed(ActionEvent ae) {
                System.exit(0);
            }
        });
        
        final JRadioButton jRadioButtonA = new JRadioButton("JRadioButton A");
        final JRadioButton jRadioButtonB = new JRadioButton("JRadioButton B");
        final JRadioButton jRadioButtonC = new JRadioButton("JRadioButton C");
        
        JButton buttonReadRadio = new JButton(" Read Radio Buttons ");
        buttonReadRadio.addActionListener(new ActionListener(){
 
            @Override
            public void actionPerformed(ActionEvent ae) {
                String radioSetting = "";
                
                if (jRadioButtonA.isSelected()){
                    radioSetting += "jRadioButtonA is selected.\n";
                }
                if (jRadioButtonB.isSelected()){
                    radioSetting += "jRadioButtonB is selected.\n";
                }
                if (jRadioButtonC.isSelected()){
                    radioSetting += "jRadioButtonC is selected.\n";
                }
                
                JOptionPane.showMessageDialog(JFrameWin.this, radioSetting);
            }
        });
        
        jPanel.add(jRadioButtonA);
        jPanel.add(jRadioButtonB);
        jPanel.add(jRadioButtonC);
        jPanel.add(buttonReadRadio);
        jPanel.add(buttonExit);
        
        this.add(jPanel);
        
    }
}


Next: Example of using Swing ButtonGroup
-

Wednesday, June 20, 2012

Oracle Java SE Critical Patch Update Advisory - June 2012

A Critical Patch Update is a collection of patches for multiple security vulnerabilities. The Critical Patch Update for Java SE also includes non-security fixes. Critical Patch Updates are cumulative and each advisory describes only the security fixes added since the previous Critical Patch Update.

Details: http://www.oracle.com/technetwork/topics/security/javacpujun2012-1515912.html

Wednesday, June 13, 2012

javax.swing.JColorChooser

In this example, I'm going to open a JColorChooser dialog from menu to select color for background.

javax.swing.JColorChooser


Continuous modify JFrameWin.java from last exercise "Example of using Swing JMenu". But, I can't setBackground on JFrame - I don't know why! So I add a JPanel over the JFrame.

package javatestswing;

import java.awt.Color;
import java.awt.event.ActionEvent;
import java.awt.event.ActionListener;
import javax.swing.JButton;
import javax.swing.JColorChooser;
import javax.swing.JFrame;
import javax.swing.JMenu;
import javax.swing.JMenuBar;
import javax.swing.JMenuItem;
import javax.swing.JPanel;

/**
 *
 * @web http://java-buddy.blogspot.com/
 */
public class JFrameWin extends JFrame{
    
    public JFrameWin(){
        
        final JPanel jPanel = new JPanel();
        
        this.setTitle("java-buddy.blogspot.com");
        this.setSize(500, 400);
        this.setDefaultCloseOperation(JFrame.EXIT_ON_CLOSE);
  
        JButton buttonExit = new JButton(" Exit ");
        buttonExit.addActionListener(new ActionListener(){

            @Override
            public void actionPerformed(ActionEvent ae) {
                System.exit(0);
            }
        });

        jPanel.add(buttonExit);
        add(jPanel);
        
        JMenuBar menuBar = new JMenuBar();
        
        JMenu menuA = new JMenu("Choose Color");
        JMenuItem menuItemDoColorChooser = new JMenuItem("Open JColorChooser");
        menuItemDoColorChooser.addActionListener(new ActionListener(){

            @Override
            public void actionPerformed(ActionEvent ae) {
                
                doColorChooser(jPanel);
            }
        });
        menuA.add(menuItemDoColorChooser);

        JMenu menuB = new JMenu("Quit...");
        JMenuItem menuItemB1 = new JMenuItem("Exit");
        menuItemB1.addActionListener(new ActionListener(){

            @Override
            public void actionPerformed(ActionEvent ae) {
                System.exit(0);
            }
        });
        menuB.add(menuItemB1);

        
        menuBar.add(menuA);
        menuBar.add(menuB);
        this.setJMenuBar(menuBar);
        
    }
    
    private void doColorChooser(JPanel panel){
        Color color = JColorChooser.showDialog(
                panel,
                "JColorChooser",
                panel.getBackground());
        
        if (color != null){
            panel.setBackground(color);
        }
    }
}


Example of using Swing JMenu

Example of using Swing JMenu


Modify JFrameWin.java from last exercise - "Run a JFrame application using SwingUtilities.invokeLater".

package javatestswing;

import java.awt.event.ActionEvent;
import java.awt.event.ActionListener;
import javax.swing.JButton;
import javax.swing.JFrame;
import javax.swing.JMenu;
import javax.swing.JMenuBar;
import javax.swing.JMenuItem;

/**
 *
 * @web http://java-buddy.blogspot.com/
 */
public class JFrameWin extends JFrame{
    
    public JFrameWin(){
        
        this.setTitle("java-buddy.blogspot.com");
        this.setSize(500, 400);
        this.setDefaultCloseOperation(JFrame.EXIT_ON_CLOSE);
                
        JButton buttonExit = new JButton(" Exit ");
        buttonExit.addActionListener(new ActionListener(){

            @Override
            public void actionPerformed(ActionEvent ae) {
                System.exit(0);
            }
        });

        this.add(buttonExit);
        
        JMenuBar menuBar = new JMenuBar();
        
        JMenu menuA = new JMenu("Menu A");
        JMenuItem menuItemA1 = new JMenuItem("Menu Item A 1");
        JMenuItem menuItemA2 = new JMenuItem("Menu Item A 2");
        JMenuItem menuItemA3 = new JMenuItem("Menu Item A 3");
        menuA.add(menuItemA1);
        menuA.add(menuItemA2);
        menuA.addSeparator();
        menuA.add(menuItemA3);
        
        JMenu menuB = new JMenu("Quit...");
        JMenuItem menuItemB1 = new JMenuItem("Exit");
        menuItemB1.addActionListener(new ActionListener(){

            @Override
            public void actionPerformed(ActionEvent ae) {
                System.exit(0);
            }
        });
        menuB.add(menuItemB1);

        
        menuBar.add(menuA);
        menuBar.add(menuB);
        this.setJMenuBar(menuBar);
        
    }
    
}


Tuesday, June 12, 2012

Run a JFrame application using SwingUtilities.invokeLater

javax.swing.SwingUtilities is a collection of utility methods for Swing. The method invokeLater(Runnable doRun) causes doRun.run() to be executed asynchronously on the AWT event dispatching thread. This will happen after all pending AWT events have been processed. This method should be used when an application thread needs to update the GUI.

Run a JFrame application using SwingUtilities.invokeLater


- Create a new Java project of Java application, with main code named JavaTestSwing.java and JFrameWin.java extends javax.swing.JFrame.

- JavaTestSwing.java
package javatestswing;

import javax.swing.SwingUtilities;

/**
 *
 * @web http://java-buddy.blogspot.com/
 */
public class JavaTestSwing {

    public static void main(String[] args) {
        SwingUtilities.invokeLater(runJFrameLater);
    }
    
    static Runnable runJFrameLater = new Runnable() {

        @Override
        public void run() {
            JFrameWin jFrameWindow = new JFrameWin();
            jFrameWindow.setVisible(true);
        }
    
    };
}


- JFrameWin.java
package javatestswing;

import java.awt.event.ActionEvent;
import java.awt.event.ActionListener;
import javax.swing.JButton;
import javax.swing.JFrame;

/**
 *
 * @web http://java-buddy.blogspot.com/
 */
public class JFrameWin extends JFrame{
    
    public JFrameWin(){
        
        this.setTitle("java-buddy.blogspot.com");
        this.setSize(500, 400);
        this.setDefaultCloseOperation(JFrame.EXIT_ON_CLOSE);
        
        JButton buttonExit = new JButton(" Exit ");
        buttonExit.addActionListener(new ActionListener(){

            @Override
            public void actionPerformed(ActionEvent ae) {
                System.exit(0);
            }
        });
        
        this.add(buttonExit);
        
    }
    
}


Friday, June 8, 2012

Update UI in JavaFX Application Thread using Platform.runLater()

Last exercise show how to do something in background thread using ExecutorService. The code update UI element(textCounter) in background thread. It's not a good practice to do so, may be it cannot run on some OS!

It's a easy approach to solve it with javafx.application.Platform class. The method Platform.runLater(java.lang.Runnable runnable) run the specified Runnable on the JavaFX Application Thread at some unspecified time in the future. You can also call Platform.isFxApplicationThread() to check if the calling thread is the JavaFX Application Thread.

Update UI in JavaFX Application Thread using Platform.runLater()


package javafx.ex;

import java.util.concurrent.Executors;
import java.util.concurrent.ScheduledExecutorService;
import java.util.concurrent.TimeUnit;
import javafx.application.Application;
import javafx.application.Platform;
import javafx.concurrent.Task;
import javafx.event.ActionEvent;
import javafx.event.EventHandler;
import javafx.scene.Scene;
import javafx.scene.control.Button;
import javafx.scene.layout.StackPane;
import javafx.scene.layout.VBox;
import javafx.scene.text.Text;
import javafx.stage.Stage;

/**
 *
 * @web http://java-buddy.blogspot.com/
 */
public class testScheduledExecutorService extends Application {
    
    Text textCounter;

    /**
     * @param args the command line arguments
     */
    public static void main(String[] args) {
        launch(args);
    }
    
    @Override
    public void start(Stage primaryStage) {
        Button btn = new Button();
        btn.setText("Start ScheduledExecutorService");
        btn.setOnAction(new EventHandler<ActionEvent>() {
            @Override
            public void handle(ActionEvent event) {
                startScheduledExecutorService();
            }
        });
        
        textCounter = new Text();
        
        VBox vBox = new VBox();
        vBox.getChildren().addAll(btn, textCounter);
        
        StackPane root = new StackPane();
        root.getChildren().add(vBox);
        
        Scene scene = new Scene(root, 300, 250);
        
        primaryStage.setTitle("java-buddy.blogspot.com");
        primaryStage.setScene(scene);
        primaryStage.show();
    }
    
    private void startScheduledExecutorService(){

        final ScheduledExecutorService scheduler 
            = Executors.newScheduledThreadPool(1);

        scheduler.scheduleAtFixedRate(
                new Runnable(){
                     
                    int counter = 0;
                     
                    @Override
                    public void run() {
                        counter++;
                        if(counter<=10){
                            
                            Platform.runLater(new Runnable(){
                                @Override
                                public void run() {
                                    textCounter.setText(
                                    "isFxApplicationThread: " 
                                    + Platform.isFxApplicationThread() + "\n"
                                    + "Counting: "
                                    + String.valueOf(counter));
                                }
                            });
                            
                            
                        }else{
                            scheduler.shutdown();
                            Platform.runLater(new Runnable(){
                                @Override
                                public void run() {
                                    textCounter.setText(
                                    "isFxApplicationThread: " 
                                    + Platform.isFxApplicationThread() + "\n"
                                    + "-Finished-");
                                }
                            });
                        }
                         
                    }
                }, 
                1, 
                1, 
                TimeUnit.SECONDS);      
    }
}


Thursday, June 7, 2012

Example of using ExecutorService

ScheduledExecutorService is an ExecutorService that can schedule commands to run after a given delay, or to execute periodically.

ScheduledExecutorService


package javafx.ex;

import java.util.concurrent.Executors;
import java.util.concurrent.ScheduledExecutorService;
import java.util.concurrent.TimeUnit;
import javafx.application.Application;
import javafx.event.ActionEvent;
import javafx.event.EventHandler;
import javafx.scene.Scene;
import javafx.scene.control.Button;
import javafx.scene.layout.StackPane;
import javafx.scene.layout.VBox;
import javafx.scene.text.Text;
import javafx.stage.Stage;

/**
 *
 * @web http://java-buddy.blogspot.com/
 */
public class testScheduledExecutorService extends Application {
    
    Text textCounter;

    /**
     * @param args the command line arguments
     */
    public static void main(String[] args) {
        launch(args);
    }
    
    @Override
    public void start(Stage primaryStage) {
        Button btn = new Button();
        btn.setText("Start ScheduledExecutorService");
        btn.setOnAction(new EventHandler<ActionEvent>() {
            @Override
            public void handle(ActionEvent event) {
                startScheduledExecutorService();
            }
        });
        
        textCounter = new Text();
        
        VBox vBox = new VBox();
        vBox.getChildren().addAll(btn, textCounter);
        
        StackPane root = new StackPane();
        root.getChildren().add(vBox);
        
        Scene scene = new Scene(root, 300, 250);
        
        primaryStage.setTitle("java-buddy.blogspot.com");
        primaryStage.setScene(scene);
        primaryStage.show();
    }
    
    private void startScheduledExecutorService(){
        final ScheduledExecutorService scheduler 
            = Executors.newScheduledThreadPool(1);

        scheduler.scheduleAtFixedRate(
                new Runnable(){
                    
                    int counter = 0;
                    
                    @Override
                    public void run() {
                        counter++;
                        if(counter<=10){
                            textCounter.setText("Counting: " 
                                    + String.valueOf(counter));
                        }else{
                            scheduler.shutdown();
                            textCounter.setText("-Finished-");
                        }
                        
                    }
                }, 
                1, 
                1, 
                TimeUnit.SECONDS);        
    }
}


Please note that it's not a good practice to update UI in background thread. Refer to next article to Update UI in JavaFX Application Thread using Platform.runLater().

Wednesday, June 6, 2012

Set font of text using FXML vs JavaFX

Example to set font using FXML:

<?xml version="1.0" encoding="UTF-8"?>

<?import java.lang.*?>
<?import java.util.*?>
<?import javafx.scene.*?>
<?import javafx.scene.control.*?>
<?import javafx.scene.layout.*?>
<?import javafx.scene.text.*?>

<AnchorPane id="AnchorPane" prefHeight="200" prefWidth="320" xmlns:fx="http://javafx.com/fxml" fx:controller="javafxml_text.Sample">
    <children>

        <Text layoutX="10" layoutY="30" stroke="BLACK" text="Set Font in FXML">
            <font>
                <Font name="Arial Black" size="24.0" />
            </font>
        </Text>
        
    </children>
</AnchorPane>


Set font in FXML


Example to set font using JavaFX:

package javafx_text;

import javafx.application.Application;
import javafx.scene.Scene;
import javafx.scene.layout.StackPane;
import javafx.scene.text.Font;
import javafx.scene.text.Text;
import javafx.stage.Stage;

/**
 *
 * @web http://java-buddy.blogspot.com/
 */
public class JavaFX_Text extends Application {

    /**
     * @param args the command line arguments
     */
    public static void main(String[] args) {
        launch(args);
    }
    
    @Override
    public void start(Stage primaryStage) {

        Text text = new Text();
        text.setText("Text Font in JavaFX");
        text.setFont(Font.font("Arial Black", 24.0));

        StackPane root = new StackPane();
        root.getChildren().add(text);
        
        Scene scene = new Scene(root, 300, 250);
        
        primaryStage.setTitle("java-buddy.blogspot.com");
        primaryStage.setScene(scene);
        primaryStage.show();
    }
}


Set font in JavaFX


Tuesday, June 5, 2012

Drop shadow on text, using FXML

Drop shadow on text, using FXML


<?xml version="1.0" encoding="UTF-8"?>

<?import java.lang.*?>
<?import java.util.*?>
<?import javafx.scene.*?>
<?import javafx.scene.control.*?>
<?import javafx.scene.layout.*?>
<?import javafx.scene.text.*?>
<?import javafx.scene.effect.*?>

<AnchorPane id="AnchorPane" prefHeight="200" prefWidth="320" xmlns:fx="http://javafx.com/fxml" fx:controller="javafxml_text.Sample">
    <children>

        <Text layoutX="126" layoutY="30" stroke="BLACK" text="Text with Shadow (using FXML)">
            <effect>
                <DropShadow color="GRAY" offsetX="5.0" offsetY="5.0" />
            </effect>
        </Text>
        
    </children>
</AnchorPane>


Compare:
- Drop shadow on text, using JavaFX


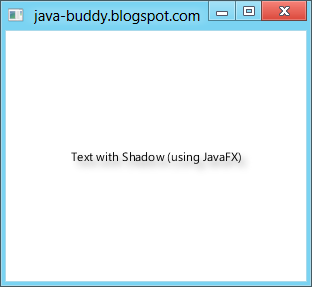
Drop shadow on text, using JavaFX

Drop shadow on text, using JavaFX


package javafx_text;

import javafx.application.Application;
import javafx.scene.Scene;
import javafx.scene.effect.DropShadow;
import javafx.scene.layout.StackPane;
import javafx.scene.paint.Color;
import javafx.scene.text.Text;
import javafx.stage.Stage;

/**
 *
 * @web http://java-buddy.blogspot.com/
 */
public class JavaFX_Text extends Application {

    /**
     * @param args the command line arguments
     */
    public static void main(String[] args) {
        launch(args);
    }
    
    @Override
    public void start(Stage primaryStage) {
        
        DropShadow shadow = new DropShadow();
        shadow.setOffsetX(5.0);
        shadow.setOffsetY(5.0);
        shadow.setColor(Color.GRAY);
        
        Text text = new Text();
        text.setText("Text with Shadow (using JavaFX)");
        text.setEffect(shadow);

        StackPane root = new StackPane();
        root.getChildren().add(text);
        
        Scene scene = new Scene(root, 300, 250);
        
        primaryStage.setTitle("java-buddy.blogspot.com");
        primaryStage.setScene(scene);
        primaryStage.show();
    }
}


Compare:
- Drop shadow on text, using FXML