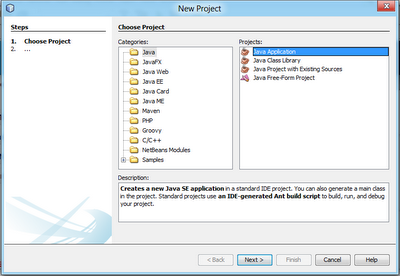
- Click File -> New Project... in NetBeans IDE top menu.
- Select Java from Categories, and Java Application from Projects. Then click Next.

- Enter helloNetBeans in Project Name field, make sure both checkbox of Create Main Class and Set as Main Project is checked. the Main class name will updated automatically when we enter Project Name. Click Finish.

- A default project will be generated for you.

- Modify the code in main() to say something.
public class HelloNetBeans {

 /**
  * @param args the command line arguments
  */
 public static void main(String[] args) {
     // TODO code application logic here
     System.out.println("Hello World! from NetBeans.");
 }
}
- Final Save(File -> Save), Build (Run -> Build Project) and Run (Run -> Run Main Project). If everything go correctly, you can see the word "Hello World! from NetBeans." in the Output windows, that means your installation is properly.

Related Article:
- How to run NetBeans compiled program
No comments:
Post a Comment